Lyman Boat Restoration
Adam Koons
Affiliate Disclosure: Thank you supporting us by visiting our site and posts. This website contains affiliate links that are ads recommended to you, that we can earn a small payout on. We only use Amazon Associates and Google Adsense. By clicking on these ads, making a purchase, or taking other action, we can earn a little extra money to fund future projects.
How to restore a Lyman Boat - Restoration Overview
Wooden boats are a true work of art. The craftsmanship and attention to detail on them are unrivaled in today's mass produced boats. They turn heads and are a conversation starter at most docks and marinas.
However, most feel they are too much work and to difficult to maintain in today's boating lifestyle. We took this project on to have a boat that could be used, enjoyed, and shared with others.
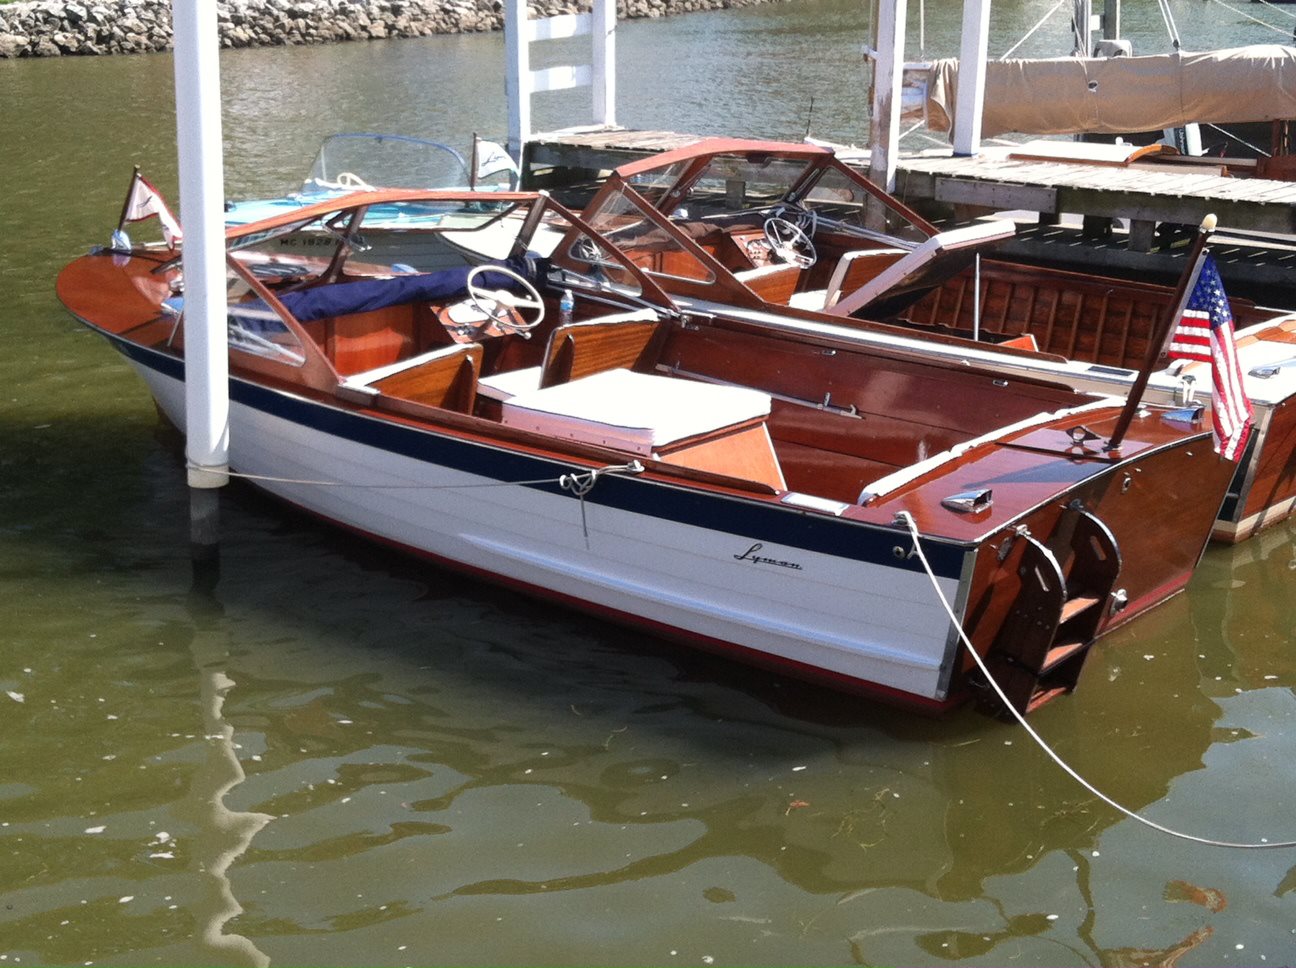
1961 - 20' Lyman Runabout
Lyman Boats were built to take the chop and rough conditions of the Great Lakes. They were made in Sandusky, Oh, right on the shores of Lake Erie. They used a "Clinker-built" or Lapstrake style of construction which allowed the hull to move in rough water.
The hulls are made of douglas fir plywood, over white oak frames (ribs). The decks and interior components are sapele mahogany.
In 1960, Lyman changed their hull design, with the most noticeable change being the transom flared out, versus having a "barrel back." In 1961, there were 333 20' Lymans produced.
The Before
This boat was purchased in Sandusky, Ohio from a Craigslist ad for $1200. It had a yard trailer and a Gray Marine 138hp inboard motor.
The Good: Complete boat with covers and cushions, Running Motor, Solid bottom, overall usable boat.
The Bad: Rot in small isolated ares on planks, worn and abused decks, chipped and cracking paint and varnish
Starting the Restoration
We started by stripping the hull sides and bottom. We used a heat gun and sharp scrapper to remove the paint. This worked great and removed several layers at once.
However, it did ignite the paint if the heat was on one spot too long, and the fumes were very strong from the burning paint.
After removing most of the paint, we could really asses the damage of the wood. Paint will cover a lot of bad issues, and getting the wood stripped down will reveal a lot more work then you initially expect.
Next was the long process of sanding. It seems never ending, but is extremely important in the finished look of the boat. Initially we used an orbital sander to get more of the bare wood exposed.
Once most the old material was removed, we took some time to tighten most of the screws through the planking and make sure they were tight into the ribs (through use and vibration, they can loosen).
Next we finished the bottom. The clinch nail holes and screw heads were filled with an epoxy and filler mix and then we fared the planks smooth. 3 coats of a Copper Racing Bottom paint were then applied using the roll and tip method. This was a little out of order, but we wanted to complete the bottom before we set it on the new trailer (which was done at a professional boat restoration shop).
While the boat was in the shop, we had a few planks repaired and some other wood work completed. It was a choice we made due to the time of year and wanting the boat completed for summer.
Once back in our shop, it was time to replace the mahogany decks. This was an exciting day!
The old decks were removed and used as patterns. First, we layed the old pieces onto the new plywood, and cut them out with a jig saw, leaving all the edges about 1" too big. Then after attaching the new mahogany, we used a router with a trim bit to make the new decks exactly flush with the boat.
Time to Paint, Stain, and Varnish
Now that the woodworking was complete, it was time to make the boat look pretty again. The hull was fared with epoxy and filler just as the bottom was, and then sanded smooth with a long board by hand. Next 3 coats of primer were applied using the roll and tip method of painting. After the primer was complete, 2 coats of topside painter were applied. We used the traditional Red, White, and Blue paint scheme that was used on most boats from the Lyman Factory.
My favorite part of this process was the mahogany. We restained all the mahogany using a "Lyman Mahogany Filler Stain" which is the same color the factor used. It was applied with a roller and then wiped off with a rag to give an even color.
After the stain had fully cured, a sealer was applied before varnishing. The sealer is a fast drying and thinner product than varnish, and it help penetrate and seal the wood before varnish. It also gives the wood the warm amber color that is know on these boats!
The last things to do were to finish final assembly and go boating. However there were a few other items of this restoration work noting that weren't pictured here:
Fuel System rebuild - new aluminum gas tank, lines and filter + rebuilt carburetor and fuel pump (would boat is only as good as your motor).
Slight trailer modifications were made. The trailer was used with a Chris Craft, and some fabrication was required.
Inside, bilge paint and sealer were applied to make future maintenance easier
The After
This was the most rewarding and enjoyable project I have ever done. The project took about a year to complete and cost about $5,000 to restore.
After enjoying the boat for a few years, it was then sold for $9,000 to finance future Lyman Boat Projects! Next up is the 15' Lyman, and the 26' Crusiette is an ongoing project.
1972 26' Lyman Crusiette
1957 15.5' Lyman Deluxe Outboard
1947 13' Lyman Runabout - Barn Find - Second Owner


