DIY Barn Doors using Antique Wooden French Doors
Adam Koons
Affiliate Disclosure: Thank you supporting us by visiting our site and posts. This website contains affiliate links that are ads recommended to you, that we can earn a small payout on. We only use Amazon Associates and Google Adsense. By clicking on these ads, making a purchase, or taking other action, we can earn a little extra money to fund future projects.
How to Build a Door Jamb and Install a Vintage Door
Vintage doors and windows have a look to them, that modern stuff just doesn’t have. They are often oversized and have details that are unique to a time when things were hand made. They make a statement when reused.
Recently, I acquired a pair of antique doors that are rumored to be from a 1890s mansion in Hocking Hills area of Ohio. They were the main entry doors to the house and were nearly 9’ tall. There aren’t many houses being built today that could fit this style of door. I bought them from a photographer that used them as a display and background of photos. I knew they had to go back on a building.
My workshop is a simple pole barn that was once a horse barn. There is a total of 3 windows and the entry is on the backside of the barn, away from the house. There wasn’t enough light. It was inconvenient to walk all the way around the barn to enter in. I have a place for giant vintage doors!
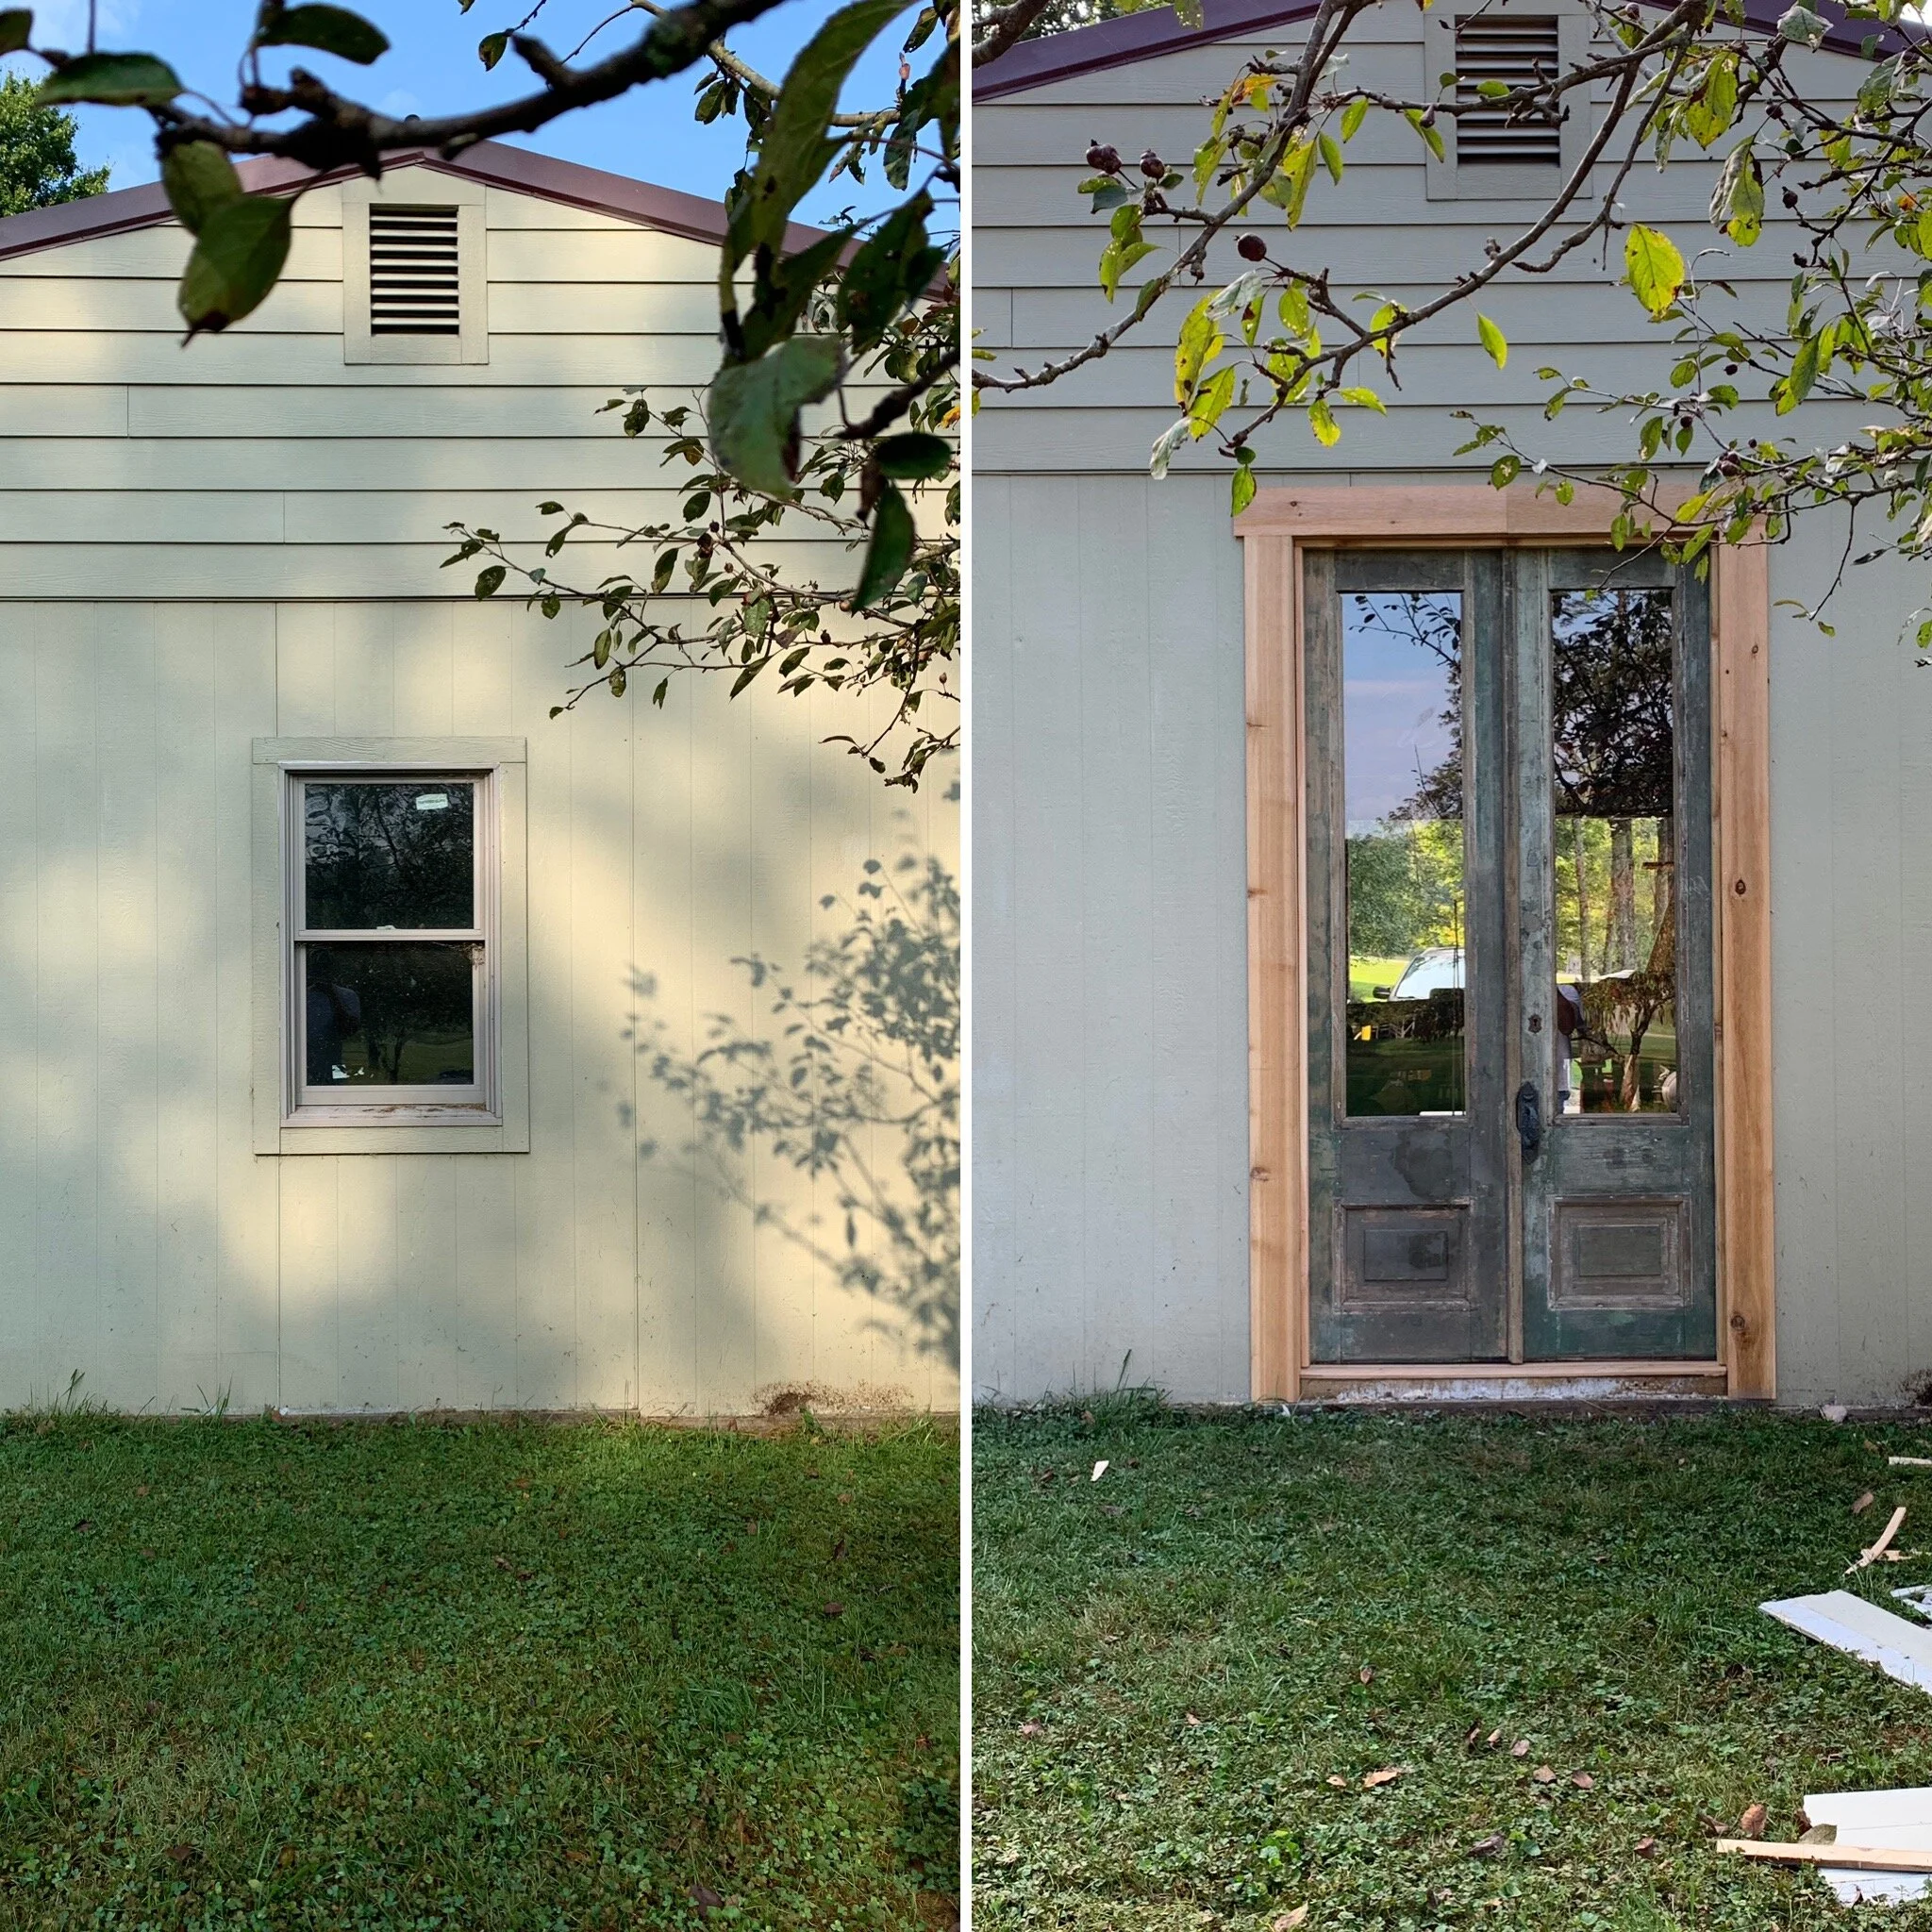
Let’s just start with this before and after!
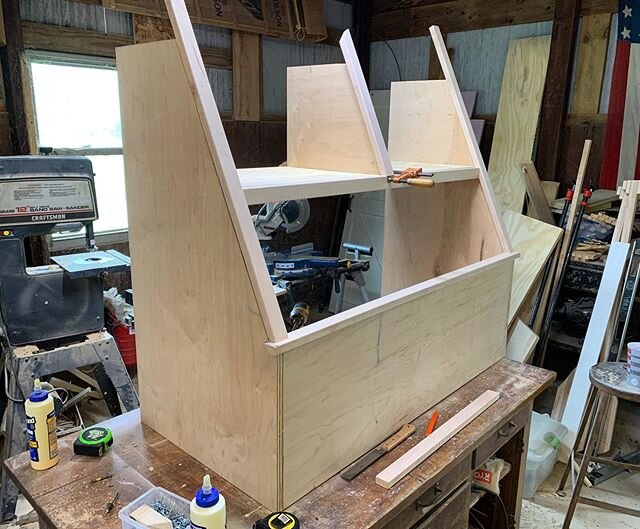
How to make a Door JamB for an Antique Door
Since these doors were going to be outside, I purchased 1x6 cedar boards for the door jamb and exterior trim. You will want to select lumber based on your specific use.
I started by cutting the hinges into the doors where I thought the should go. I visually went off the doors and then made it symmetrical. To recess the hinges, I used a chisel and removed material by hand. It takes a little longer then using a power tool, but hand tools give you more control and there is something satisfying about slowly chipping wood away and seeing things take shape. Once the spaces were cut, I screwed in the hinges where they would go so I could line them up on the door jamb.


Next I cut the hinges into the boards that would be the sides of the jamb. I left these boards plenty long and planned to cut them to size once the hinges were located and cut. Putting the hinges in first allows for slight adjustments if all the hinges don’t fit exactly into the pockets.

To determine the length I had to sketch everything out on the whiteboard in my shop. The general idea is to have an 1/8” clearance all the way around, between your doors and jamb. I made mine like this:
1.25” longer than the door at the bottom. That allows for 7/8” for the threshold, space for the door sweep, and allowance for 1/8” clearance space.
1” taller than the door at the top. That allows for the top header, and a 1/8’ gap.
Along the top and bottom of the side pieces, I used a router and cut in a dado for a strong joint. I cut the depth of the dado to 5/8” by the thickness of the wood.
Next, I cut the top. This was easy to measure because the space was already prepared for it. The bottom threshold is the same measurement. Once the door had a jamb all the way around, it was time to cut a hole in the side of the building!
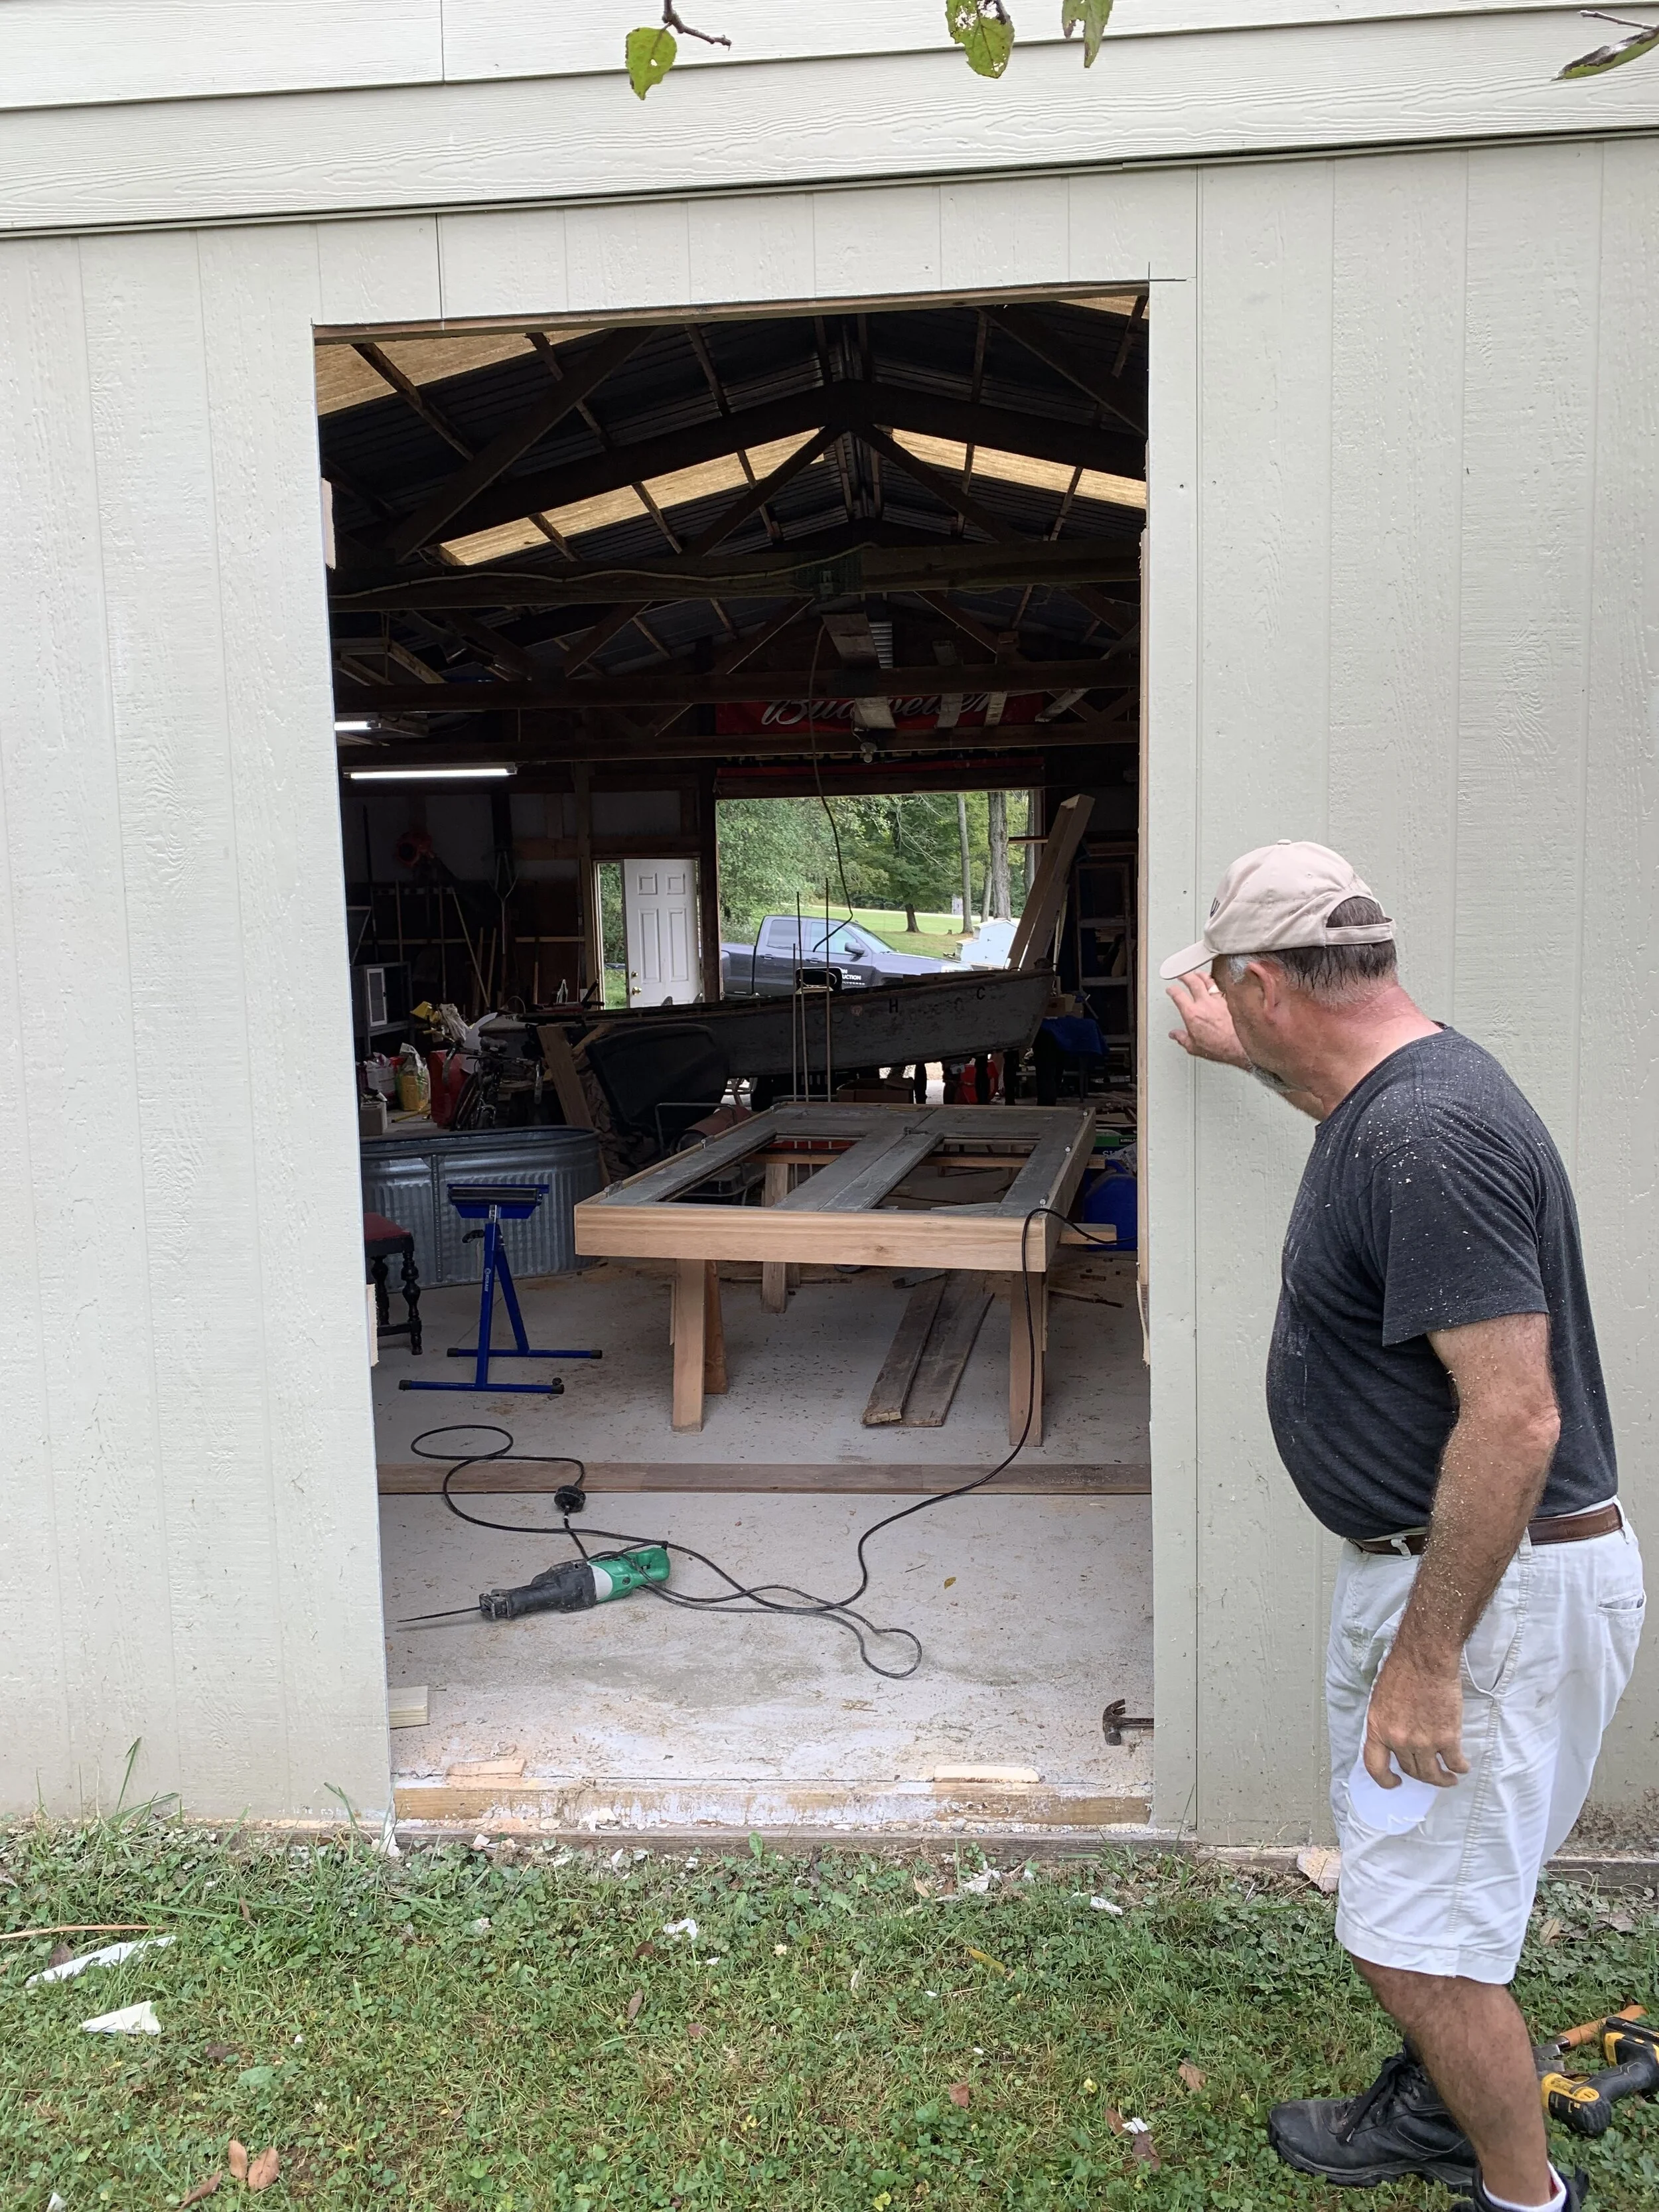
Installing A Vintage Exterior Door

Our building is a typical pole barn style construction. There is no interior framing so adding an opening is fairly easy. First we took several measurements to get the opening exactly where we wanted it, centered on the building. The opening was about an inch larger on all sides of the jamb. The space is needed to shim the jamb and make sure the door is level and plumb in every way.
The opening was then cut from the exterior of the building. Once we had the large hole in the wall, I framed the wall to stabilize and provide structure for the doors. The framing was standard 2x4 framing.

With a hole framed, it was time to lift the door into place and nail it square and level. At this point there should be working doors.
The final step is to add door trim and stops to complete the door and weather proof it. I used more 1x6 cedar and cut everything to my door size. There are several styles of applying door casing, and I went with a modern style vs a mitered corner.

Our French Door Style Barn Doors
And here is the finished doors with new glass and functional again!


See more of our Featured Projects!


Check out what else we have been working on!