DIY Squirrel Feeder - Scrap Wood Projects
Adam Koons
Affiliate Disclosure: Thank you supporting us by visiting our site and posts. This website contains affiliate links that are ads recommended to you, that we can earn a small payout on. We only use Amazon Associates and Google Adsense. By clicking on these ads, making a purchase, or taking other action, we can earn a little extra money to fund future projects.


Squirrels sitting at tables and on chairs eating is one of the silliest things I have seen trend online. However, its also one of those things that is the perfect conversation starter for the yard, something for the kids to watch, and a use of those scrap wood pieces that you say you have to keep because you will need it some day.
Today can be the day for you to use your scraps on a fun and silly project!
How to Build a Picnic Table Squirrel Feeder
For this project I used what was laying around the shop. It is really easy to use what you have, and this is not intended to be a cut list that has to be followed exactly.

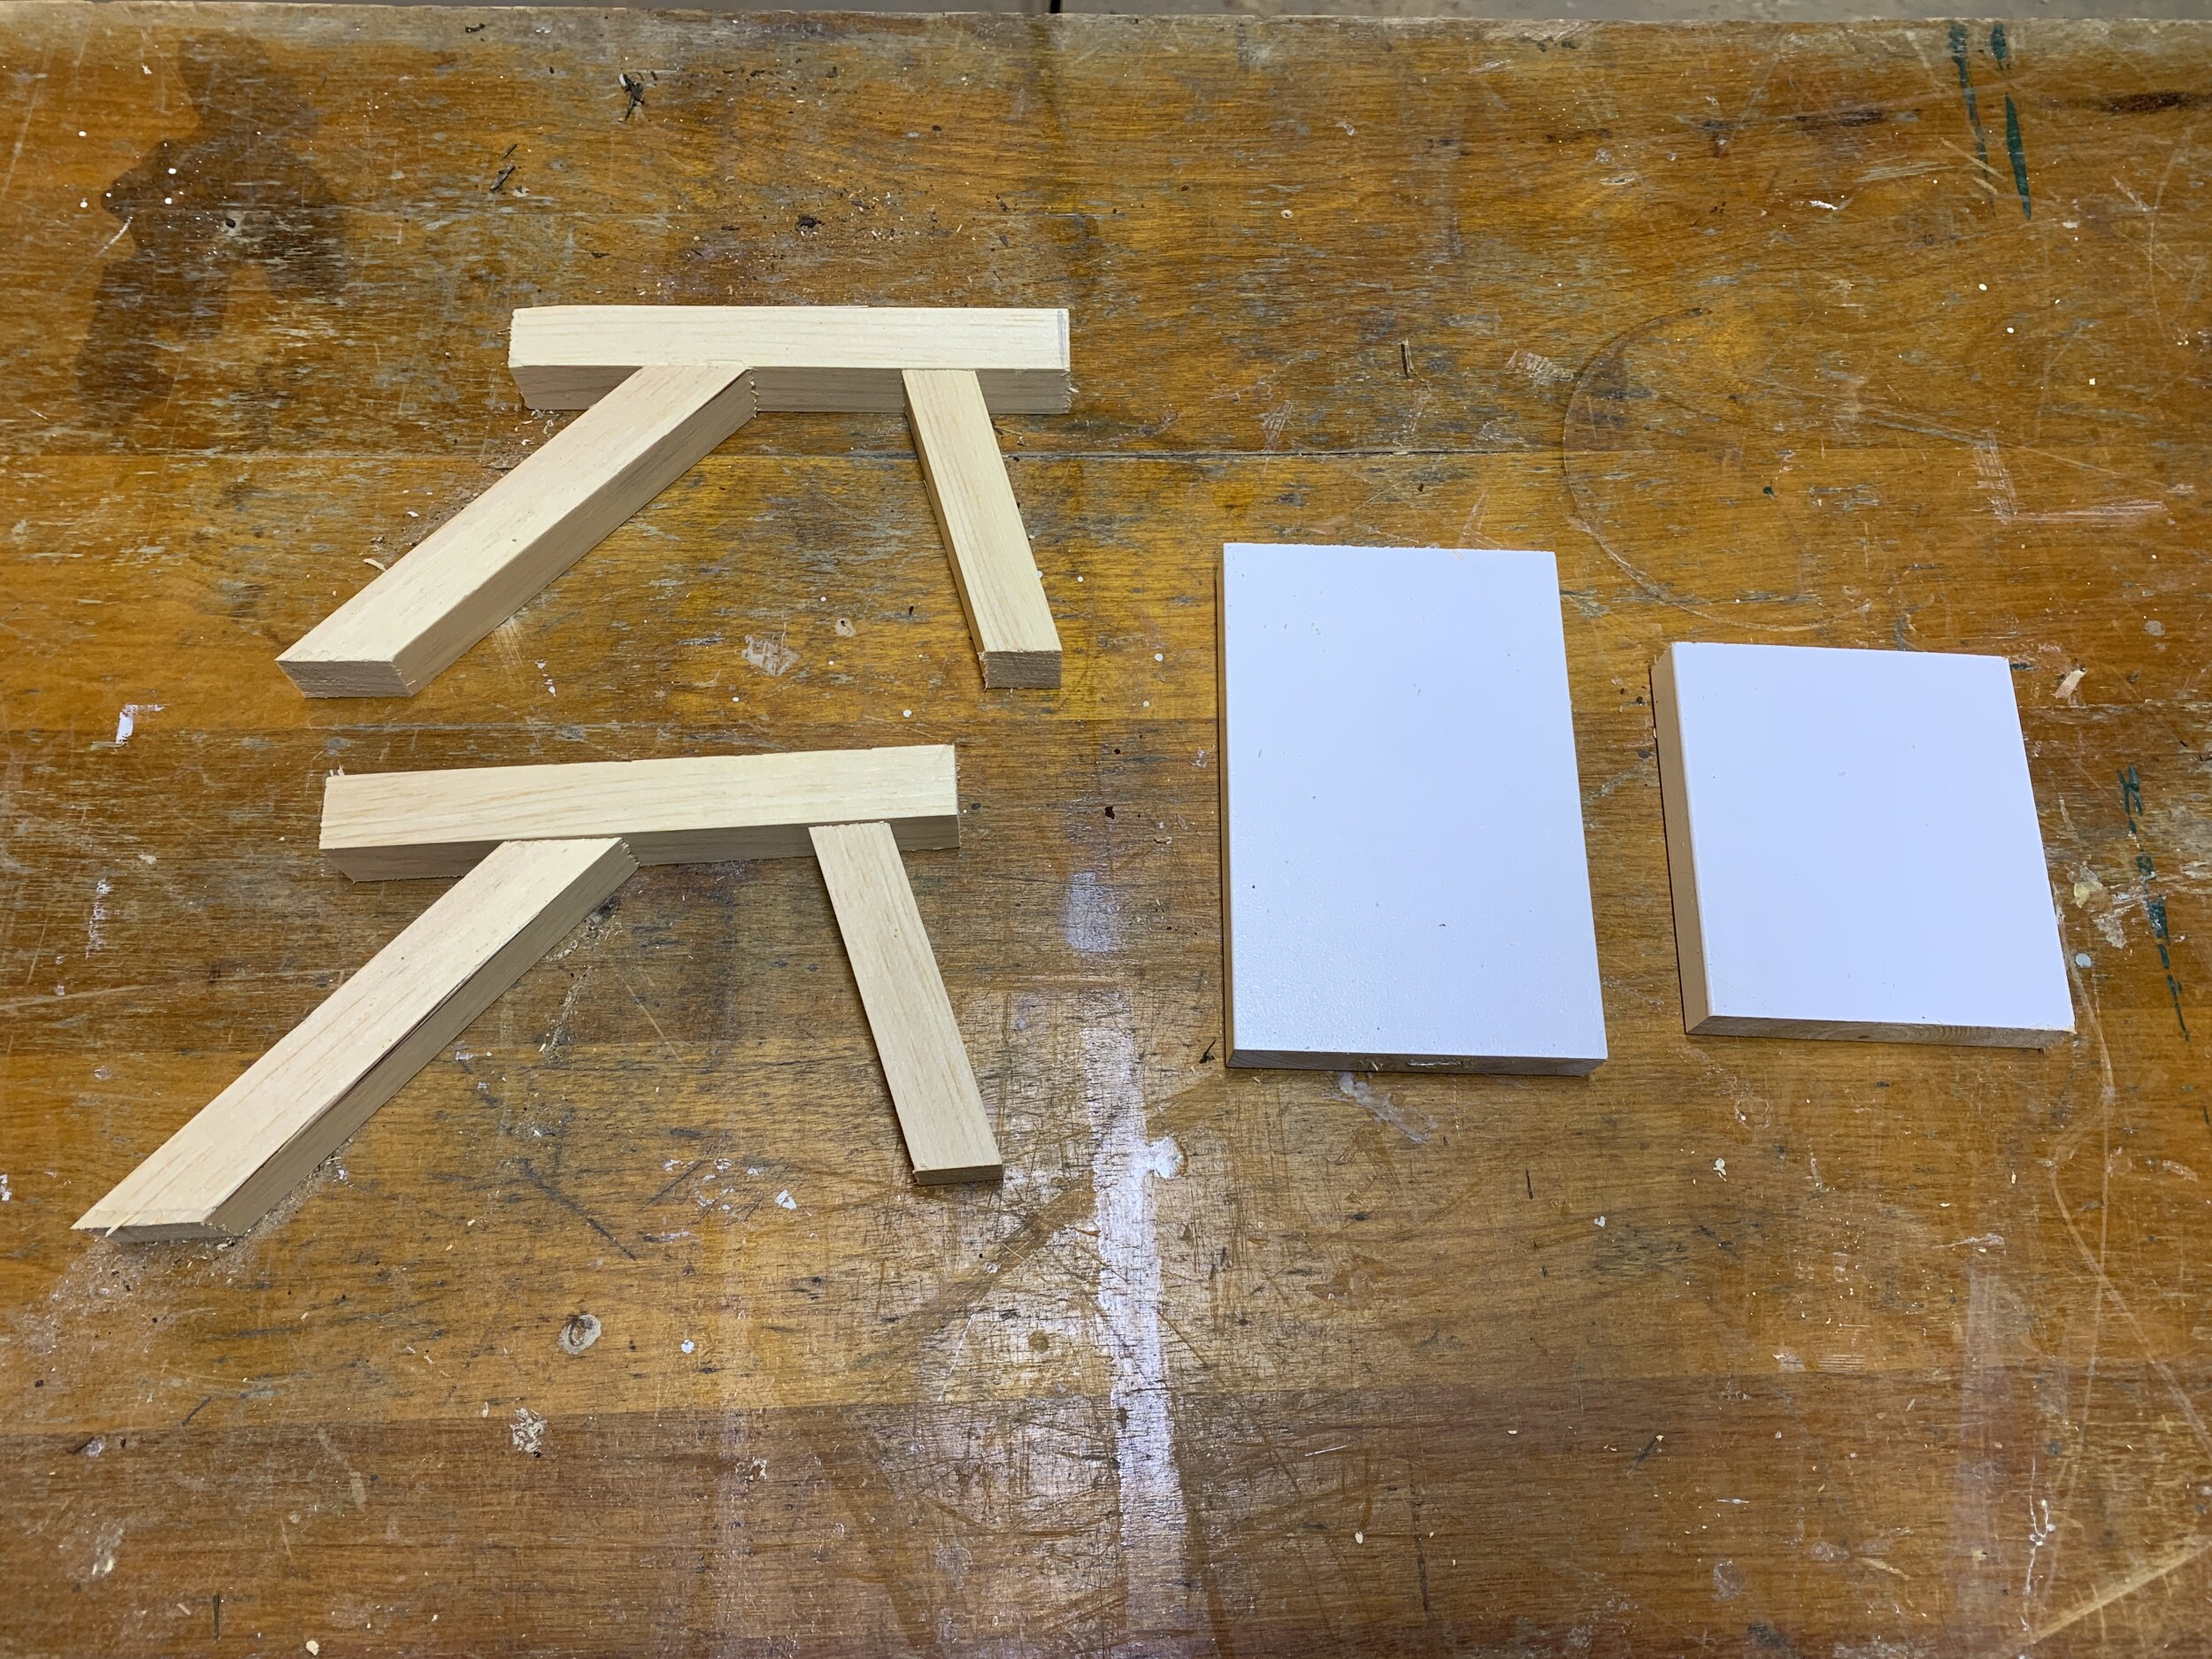
I started with some 3/4” x 1” scraps that I would use for the Squirrel Table base. I started by cutting the legs on the miter saw. The legs are cut at a 15 degree angle and both ends are parallel. The total length from the toe (point) to the heel (not point of the cut) is 3.5”.
Next I cut the seat brackets from the same size scraps. These were cut to 7” long (8” would probably be better.
The Table top was a 1x4 cut to 5” long. The benches were more scraps that are roughly 3/4”x2” by 5” long.
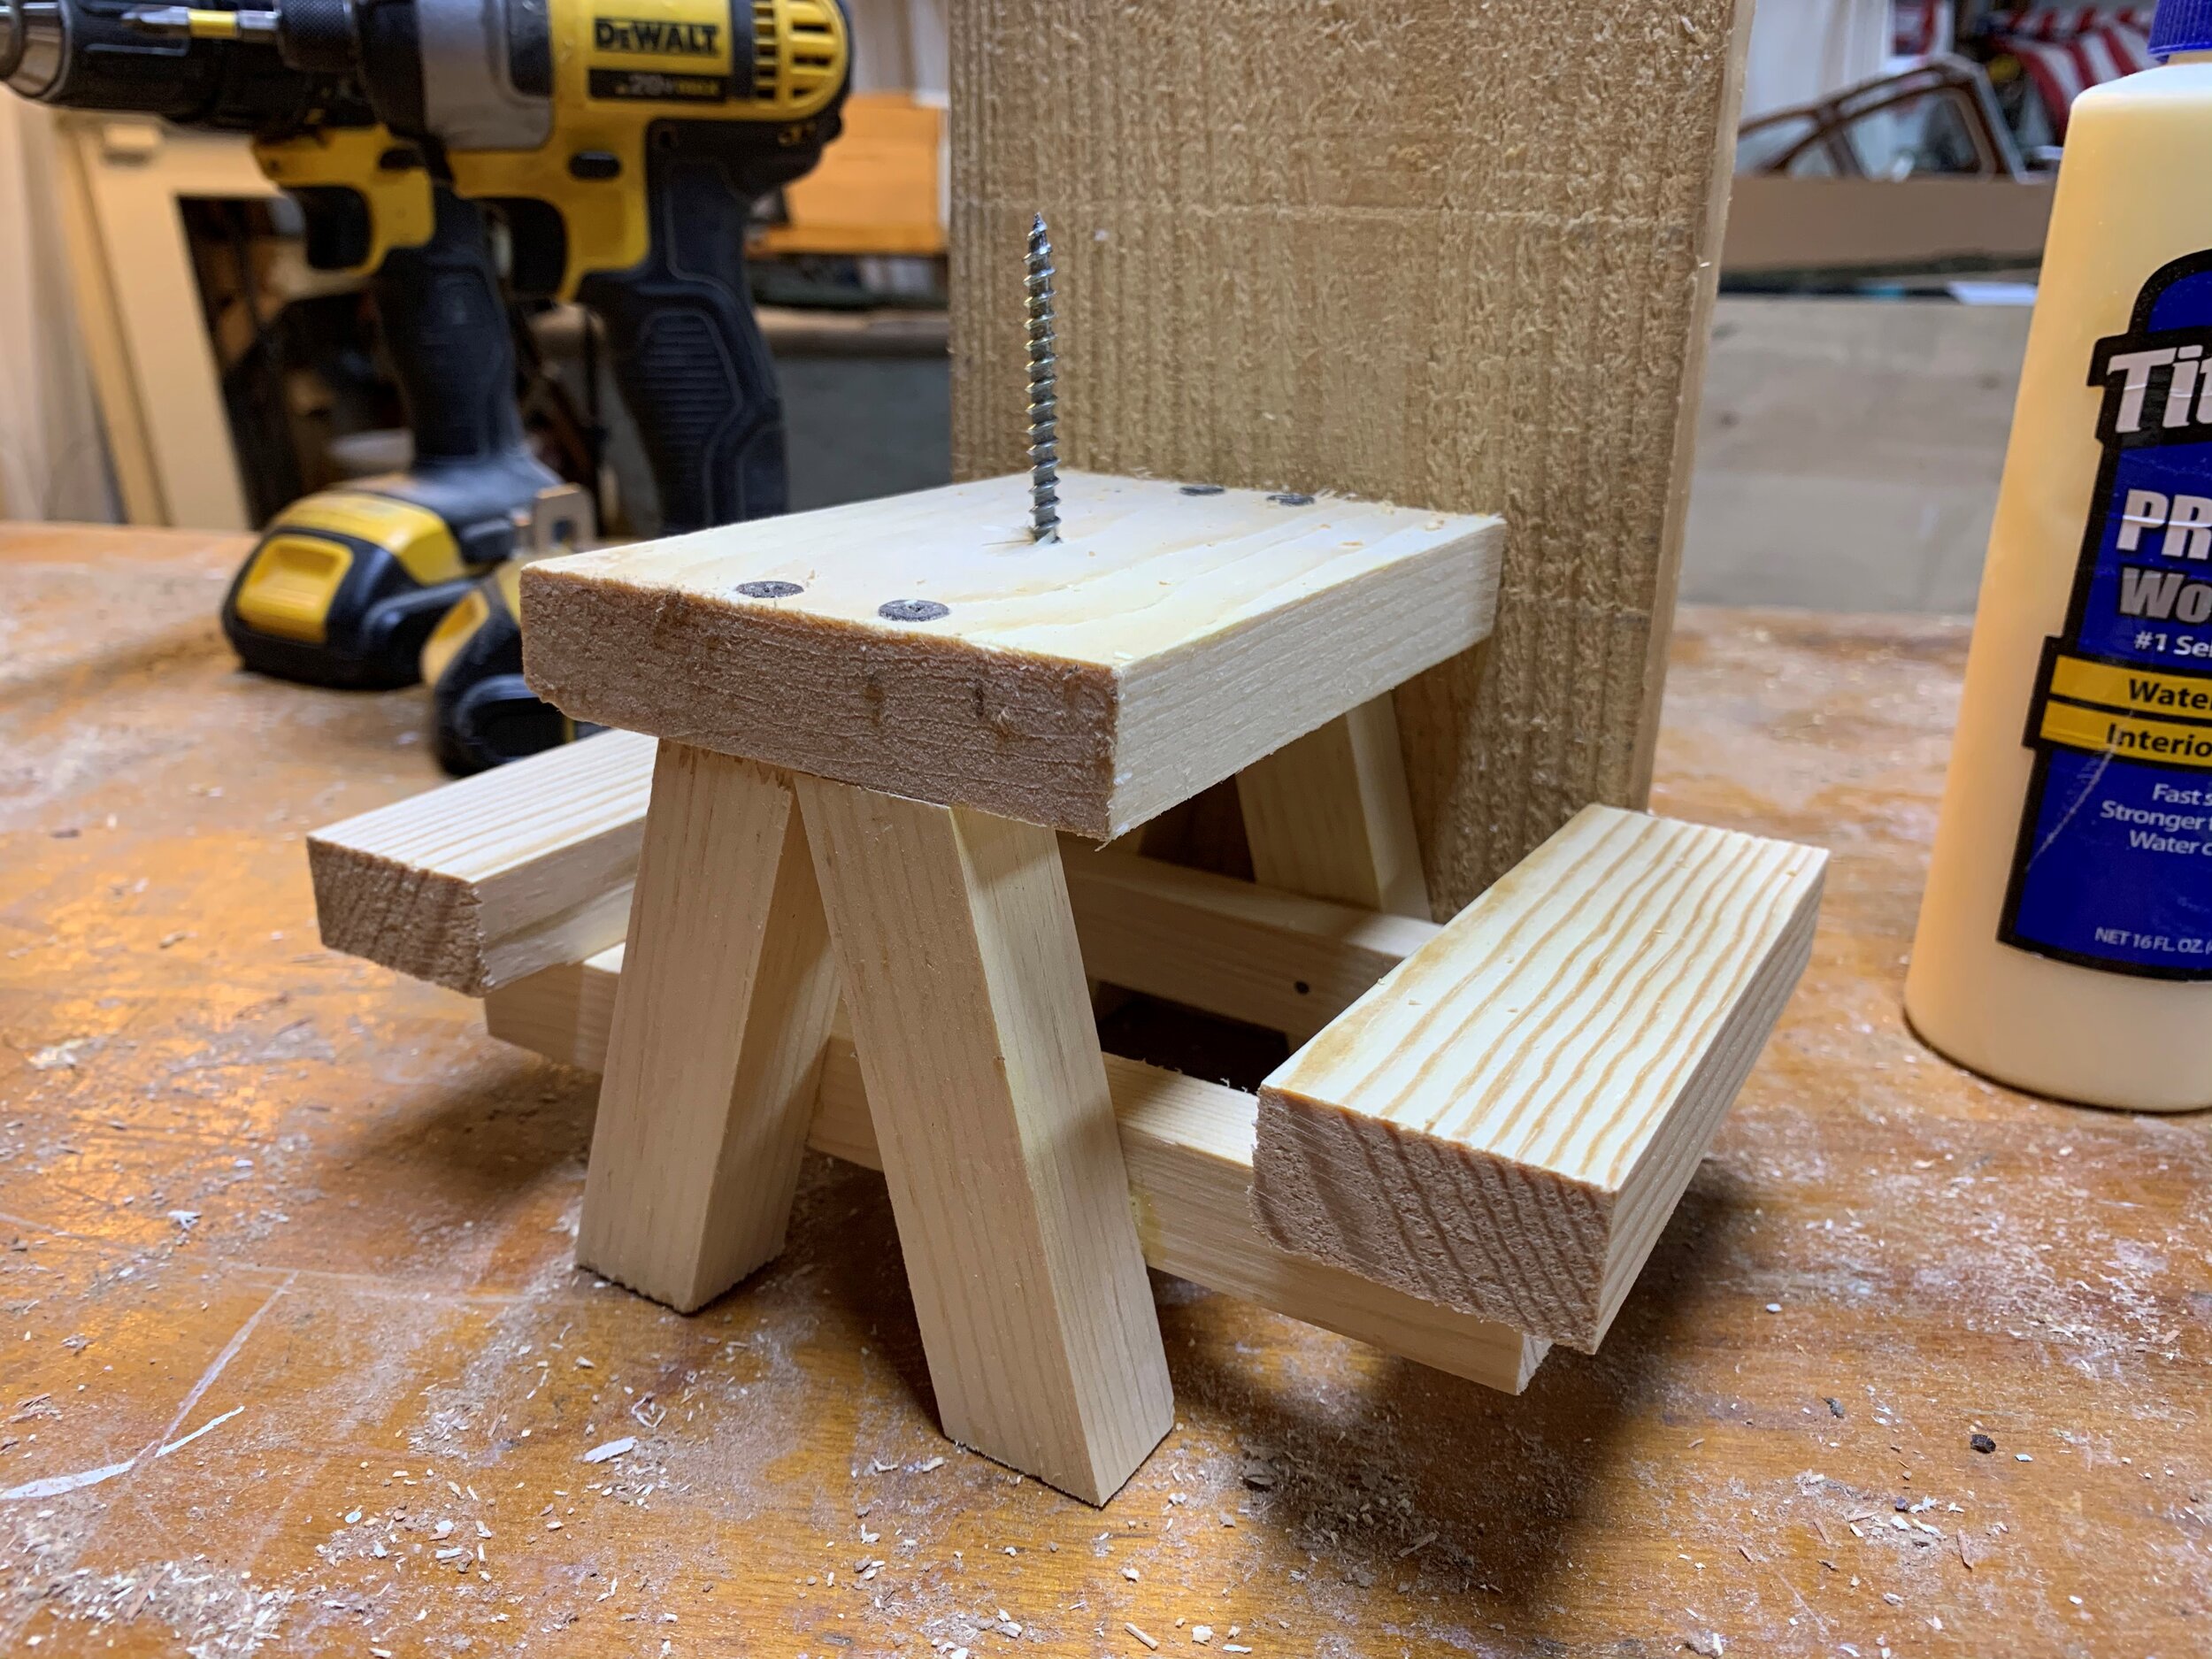
To Assemble the Picnic Table Squirrel Feeder

Put the table legs opposite each other to for the sides of an “A”. then measure up 3/4” from the bottom of the legs. Center and attach the seat brackets using brad or finish nails and wood glue.

Next, attach the legs to the table top. Brad nails or screws can work great. I used screws and made sure to predrill the holes to avoid splitting.
Finally, attach the bench seats. I screwed the seats onto the brackets from the underside of the bracket. This hides the fasteners and will hold it tight.
The last step in assembly is to add a hanger board. I had a piece of pallet wood that was about 6” wide and about 14” long. To attach the table to the board, I put 3 screws through the back of the board, into the table.
You can add a 2.5” screw from the underside of the table, and your done!

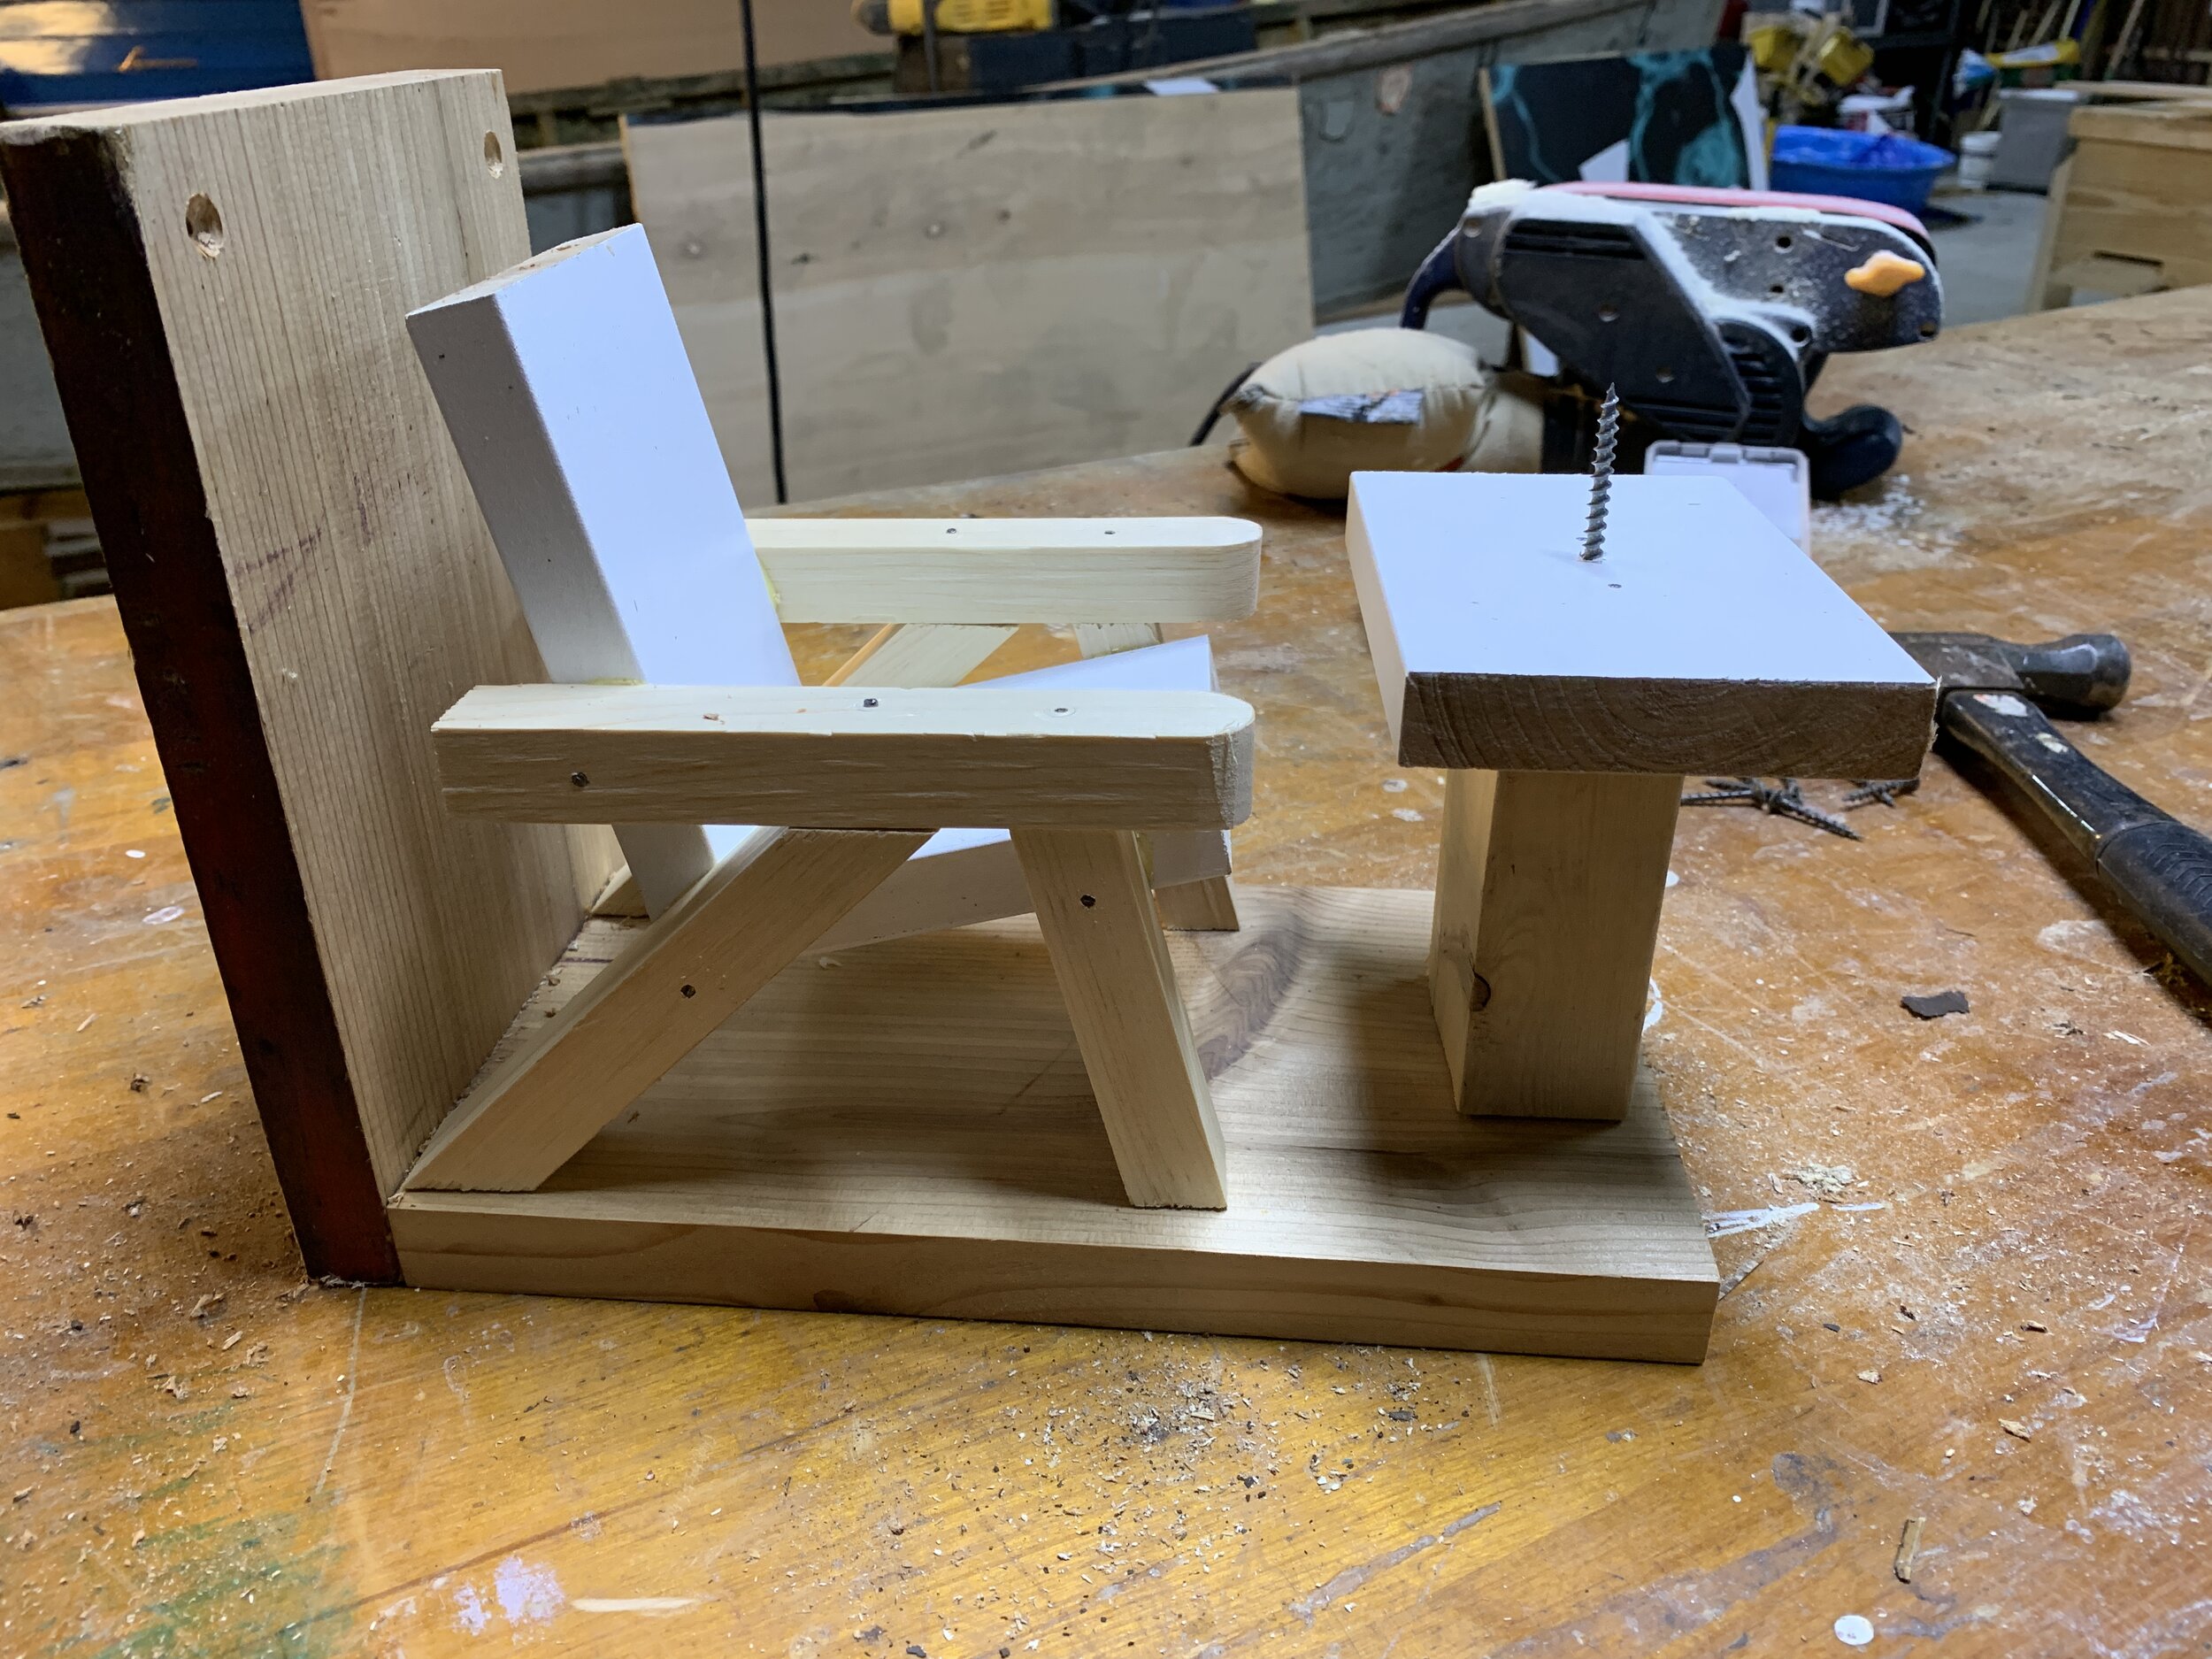
How to Build a Lounge Chair Squirrel Feeder
Once again I am using up the materials around the wood shop. For the chair, I started with 1x4 materials for the “chair” - These were wood cutoffs from the trim I did in my house. The pieces are about 6” and 4” long.
For the arm rests - they are 3/4 x 1” x 6” long. After cutting them, I used the belt sander and rounded over the end to be more Adirondack chair like.
The legs took some trial and error to get. The front leg is the same as the table legs - 3.5 inches long on a 15 degree angle. The back leg is cut at a 45 degree angle and 6” long.
The table base is made from a 2x3 and 4.5” long. The top is 1x4 and 5.5” long.
To Assemble the ADIRONDACK Squirrel Feeder

To assemble the chair, I started with the chair legs first. I made the first one by nailing the pieces together, through the arm rest. This was a bit tricky to nail, so it helps to predrill a really small hole before hammering. Once I had one made, I laid the other pieces on top of that one to make a second leg exactly like the first.
The seat is made by simple screwing the 2 boards together through the back.
Next, I nailed the legs to the chair, and once again just eyeballed what I thought would look good. Once I had one on, I clamped the second one on and nailed it to match.
To make the table, I first put a 2.5” screw through the bottom side of the table top. Then i used brad nails to nail it to the base.
The last step was to screw the chair and table onto the mounting board. I put a screw into each leg, and 2 screws into the table base.