Building a Long Langstroth Hive
Adam Koons
Affiliate Disclosure: Thank you supporting us by visiting our site and posts. This website contains affiliate links that are ads recommended to you, that we can earn a small payout on. We only use Amazon Associates and Google Adsense. By clicking on these ads, making a purchase, or taking other action, we can earn a little extra money to fund future projects.
How to Build a Long Langstroth Hive
My favorite part of beekeeping continues to be woodworking. There are so many opinions and different configurations of equipment, it is fun to build the variations and try them out myself. While researching natural beekeeping, I came across the Long Langstroth Hive and plans by Dr. Leo Sharashkin on horizontal hive.com.
This Long Langstroth Hive is basically a long deep box made from two by materials, and his claim is that it is low maintenance for the bees, and less lifting for the beekeeper. The best part, they are super cost effective to build.
Check out his plans at https://horizontalhive.com/how-to-build/long-langstroth-plans.shtml .
Note: I have no affiliation with HorizontalHives.com and give them the credit for providing free plans!
Watch us Build a Horizontal Hive
I like to build more than one when I am doing a project like this. Since it takes time to set up saws to correct depths, its so beneficial to make extra while doing it. I started by getting materials.
To build two hives:
3 - 8’ long 2x12s untreated
1 - 4x8’ sheet of plywood (we used 5/8”)
2 - 10’ long 2x4s
Various size screws - 1 1/4” and 3” are what I used
Wood Glue
Paint or sealer of your choice
I made a slight modification to the plans on HorizontalHive.com by making the long sides 47 3/4. This Makes it easy to cut 2 long ends from an 8’ board and then all the short sides from another (4 short sides for the 2 hives). This modification also makes the end grain on the short edge of the hive, which is aesthetically more appealing.
Once I had the two by materials cut, I set up an dado stack on my table saw to cut the frame rests in the long boards, and then dado on the ends to accept the sides. The depth of all these cuts were 3/8” for ease and consistency. This can be modified, but the critical space is a hair over 19” to fit a standard frame.


In learning from my mistake, I was too excited to assemble and didn’t cut in the bee entrances before assembling. The time to do it cut the entrances is before assembly, like HorizontalHive.com recommends. Drill 1/2” holes on each end of the entrances and then connect them with a router and or jig saw.
To assemble, I used wood glue and 3” screws to hole the ends together. Check for square and use a bar clamp to pull it in square if its out of line.
Once the box is made, it’s time to use a router and cut the dado in for the bottom. I recommend doing in two passes for a clean and straight cut. This dado was cut to approximately 5/8 by 1/2”. the size doesn’t matter as long as it is deep enough for for the plywood. Use a chisel to square the corners.
Now its time to cut the plywood. I made sure to check measurements for my hive before cutting. If its laid out correctly, all the parts you need can be made from the plywood. The first cut I made was to cut the plywood just over half way, which is the length of the top. Next I ripped the bottom pieces from the shorter half. With all the left over pieces, I ripped thin strips that are used for the side around the top.
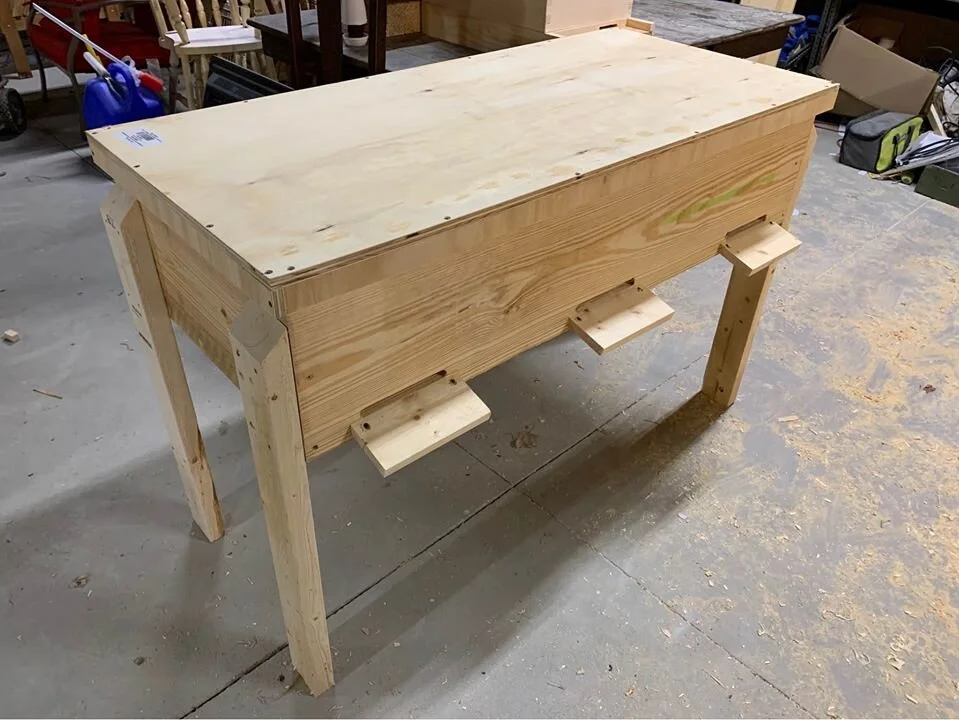
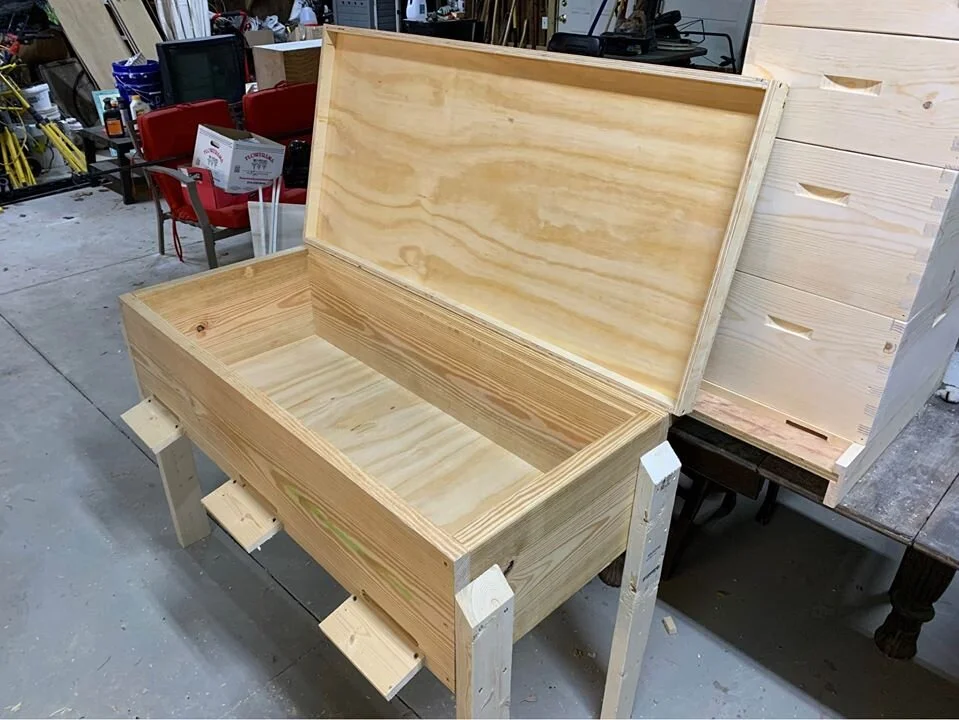
To assemble the hive, I used screws to attach the bottom. The top was glued and screwed together and should be loose fitting enough to allow air to escape and to easily remove and put back on.
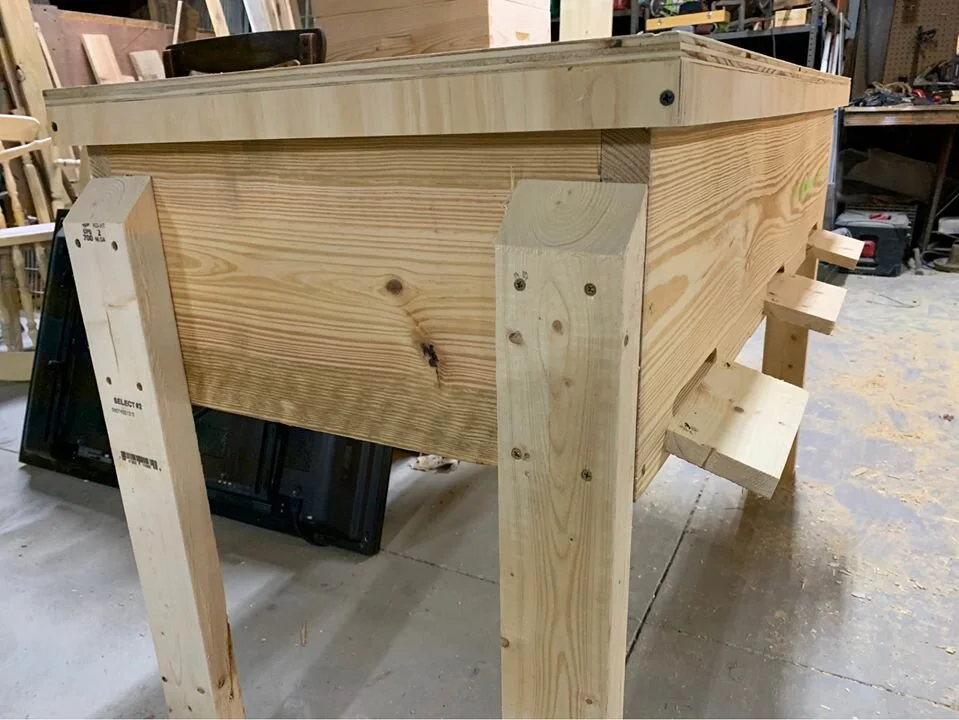
The legs are cut from the 2x4 at a 45 degree angle to help shed water. Its easiest way to screw the legs in is while the hive is on its side. I used four 3” screws into each leg.

The last step is to cut landing boards for the hive entrances. I had some scrap wood that I used for it. The first cut is to rip the board at a 15 degree angle on the table saw. Next the wood is cut to length, any length from 7-10” is ideal. To attach, predrill holes and attached with glue and screws.
Once assembled, you will need about 30 frames ready to fill it. as the bees are building out the hive, you will want a divider to separate the open area to where the bees are. Burlap is a good material for onto of the frames to keep the bees where they need to be.