How to Build A Beehive - Part 3: Building Frames
Adam Koons
Affiliate Disclosure: Thank you supporting us by visiting our site and posts. This website contains affiliate links that are ads recommended to you, that we can earn a small payout on. We only use Amazon Associates and Google Adsense. By clicking on these ads, making a purchase, or taking other action, we can earn a little extra money to fund future projects.
This article is part of a 5 part series on building beehives. I have decided to build 8 frame hives in my workshop with common woodworking tools. I am building my hives myself to save money over buying, and to challenge myself on a fulfilling project. This is not a step by step guide for a novice woodworker, but a snapshot into my experience on how I built my own hives to use.
Watch how to build beehive frames
How to Build Beehive Frames
Before starting to build my hives, I knew the frames would be the most tedious and challenging part of the build. Everything needs to be spaced precisely to leave accurate bee spacing in the hive boxes.
After my research, I found that my frames could be made from a lot of the scraps I have laying around the shop. The sides of the frames are made from 2x4’s and the other pieces would be from 3/4” cutoffs.
I am following the plans found on Beesource - Dadant Type Frames. I have no affiliation with these plans. I found them online and like them!
I started by making the frame sides first. I assumed the side to be the hardest part, and decided if the sides don’t turn out, I would order frames.
I started by planing 2x4s down to the correct width on a joiner. Then using my miter saw, I set up a stop and cut the 2x4s to length. I had 10 blocks for deep frames and 10 blocks for the medium supers. This process is the same for all Langstroth Hive Frames, and only the length of the sides change from deep, to medium.

Frame sides from scrap 2x4 lumber.
The first steps where to set up the dado blade and put the top and bottom “notch” in. I set up the dado stack to 3/4” and set a fence the the correct spacing from the edge, versus changing the thickness of the blades (The top notch is 7/8” wide, and the bottom is 3/4”). For the top, there is a 1/4” on each side of the 7/8” “notch”. I ran the block through the saw twice to make a perfectly symmetrical notch. For the bottom “notch” I centered the cut on the block and ran it through once. Having some scrap material helps set up spacing and makes cutting everything easier!
After the top and bottom notches were cut, the blocks then get sliced to 3/8” thick using fence on a band saw. This is VERY repetitive, and having a box for them to drop into is helpful.
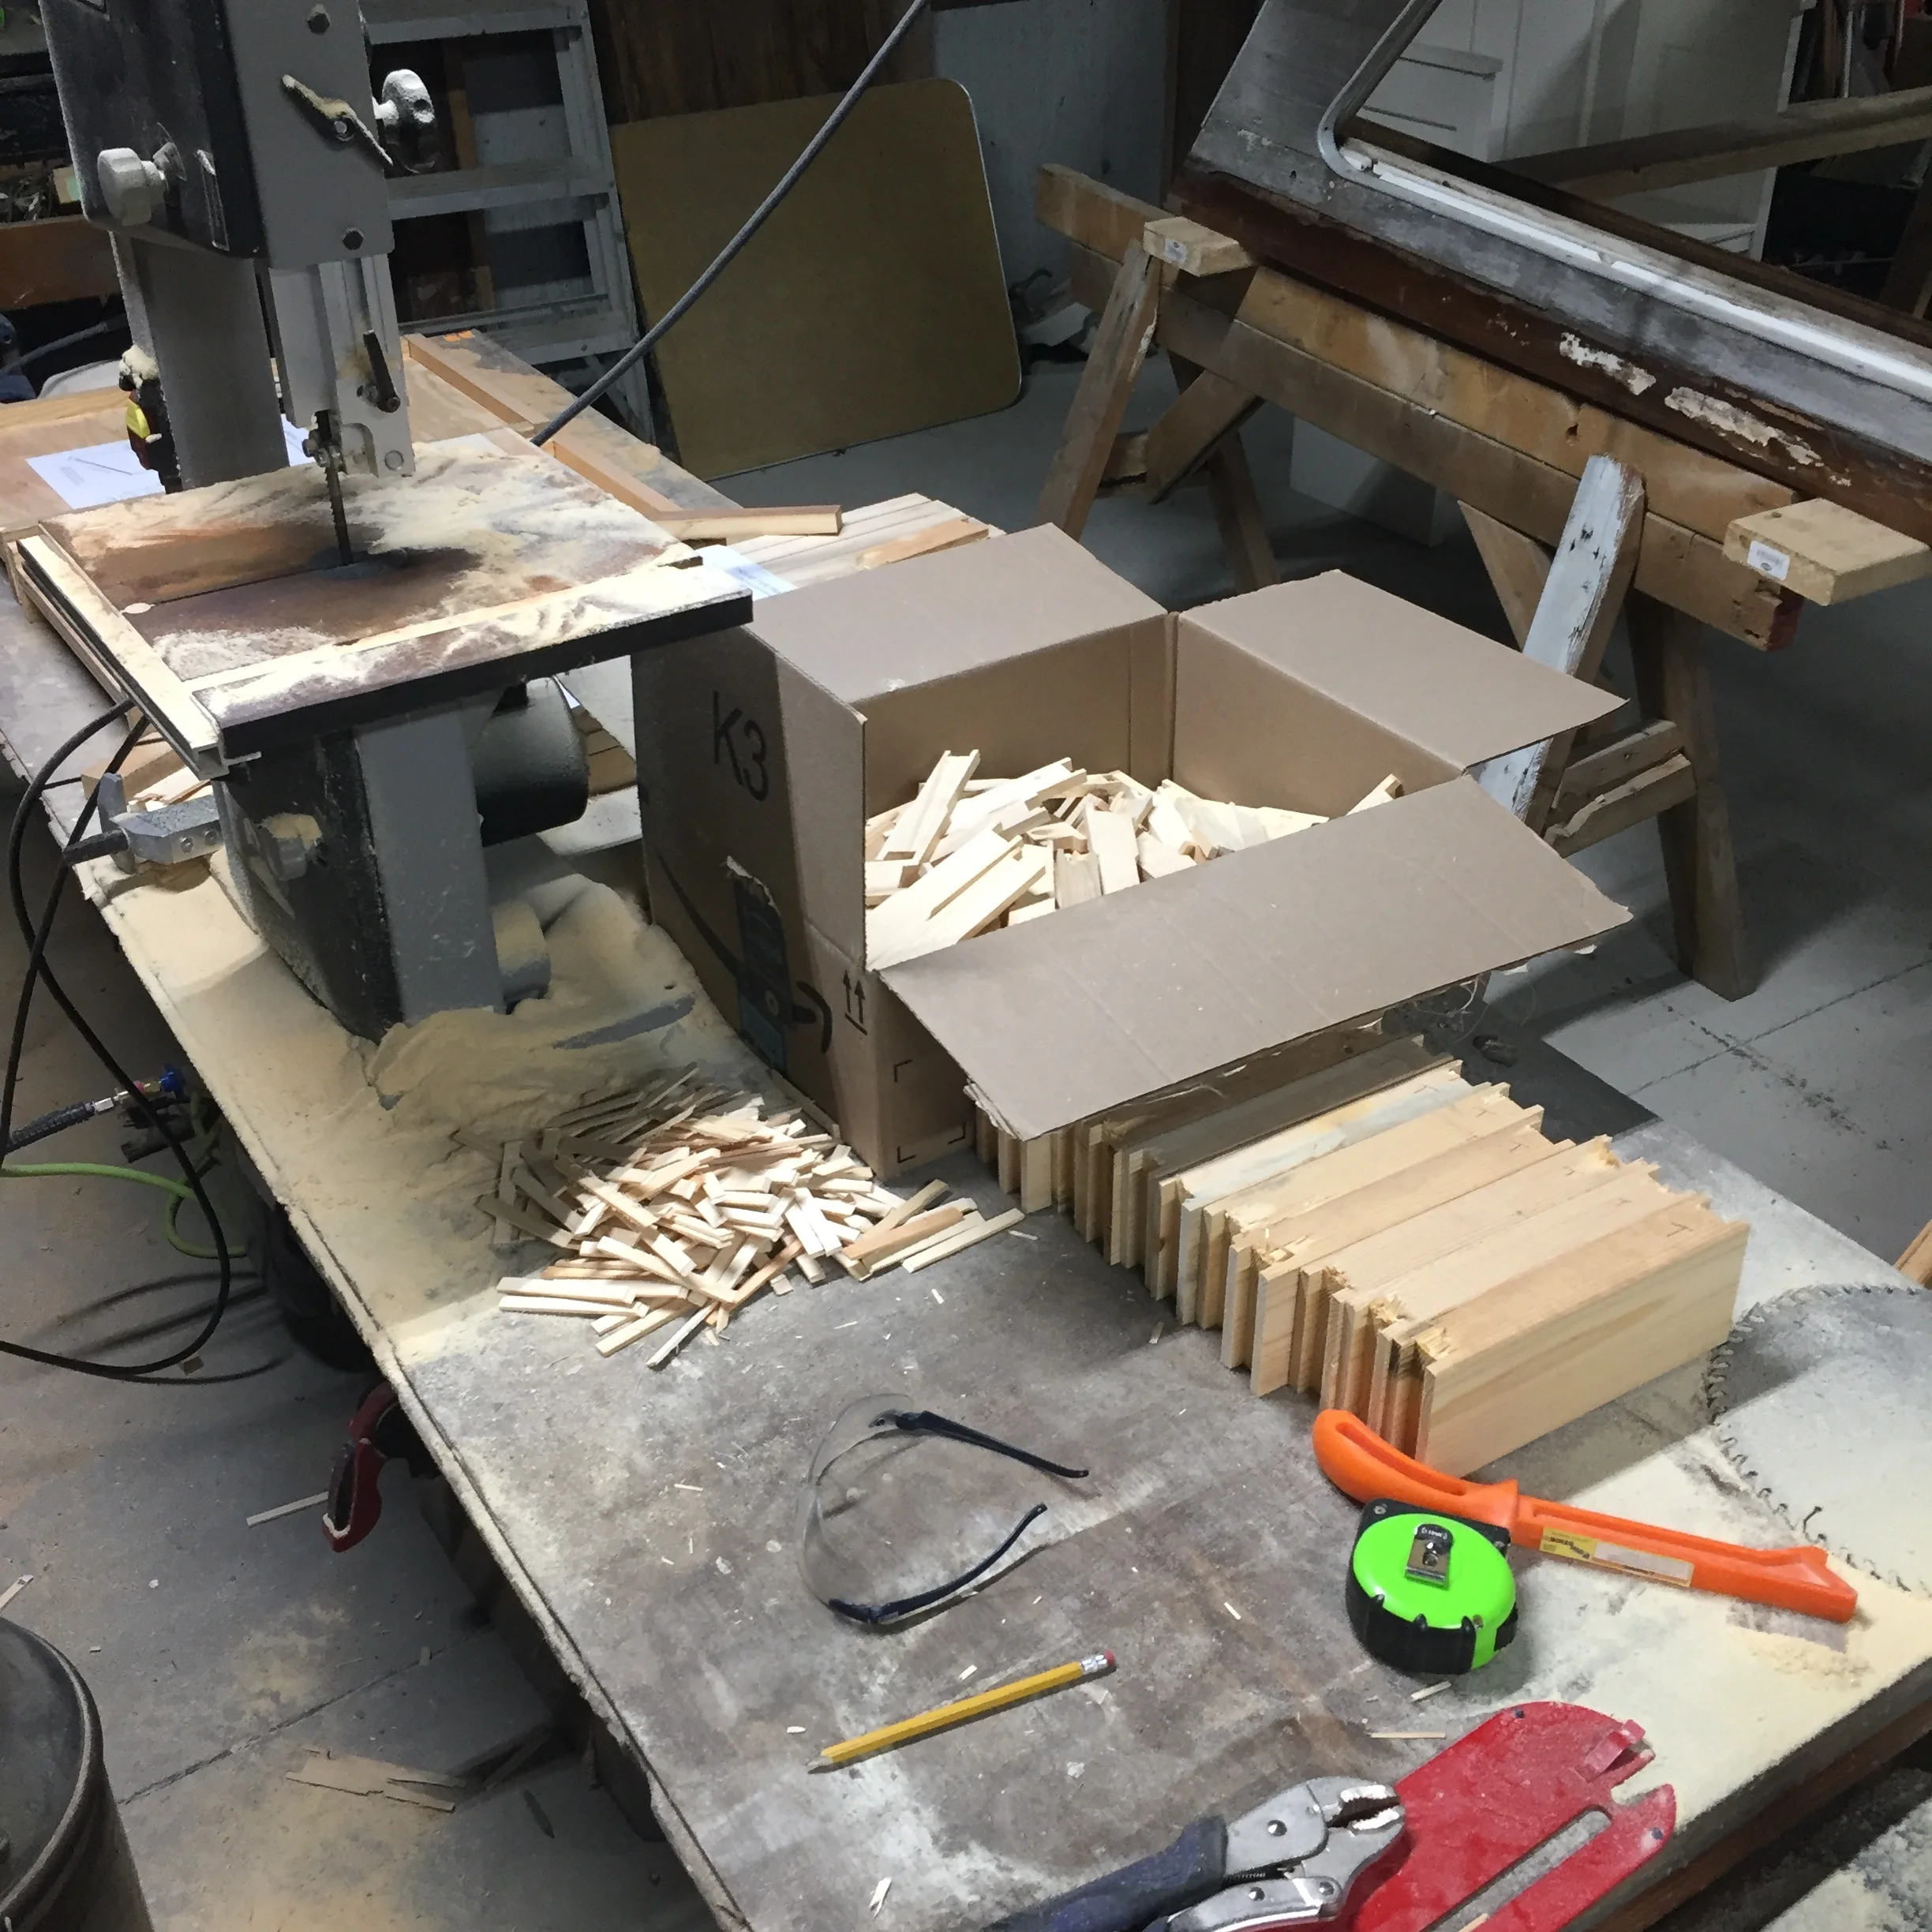
Cutting bee frames from 2x4 blocks on the band saw.
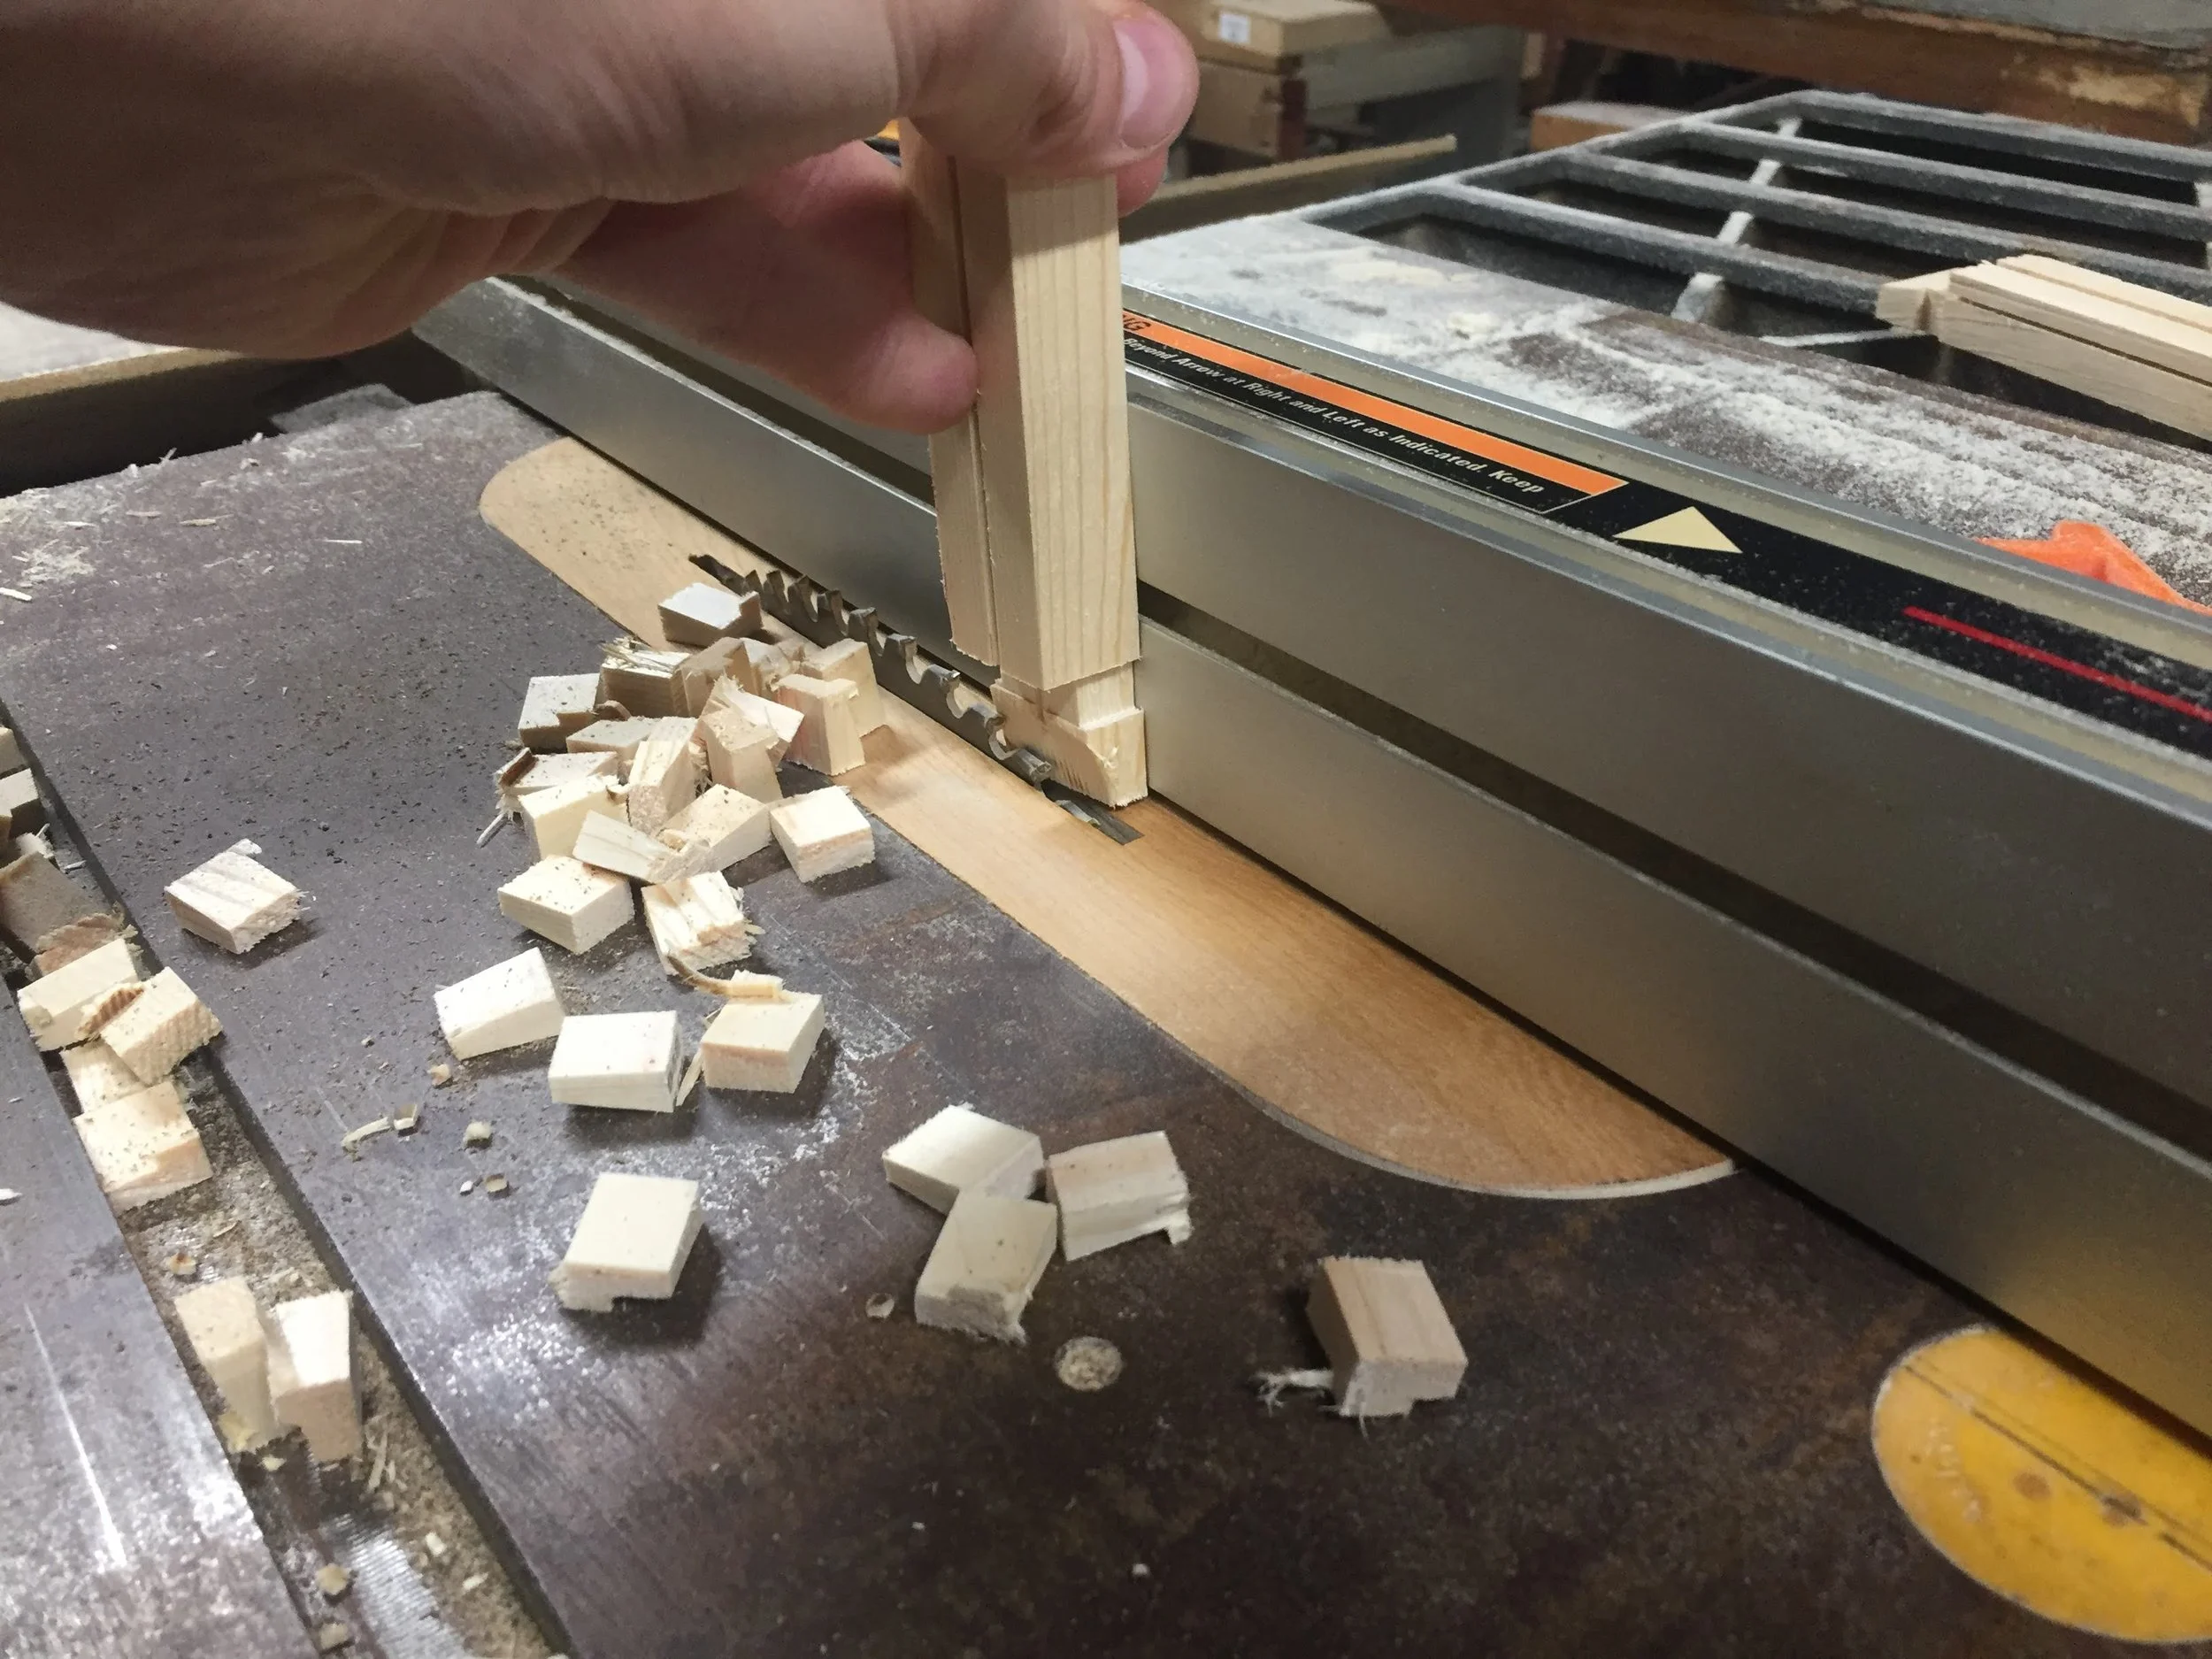
Once all the slices are complete, then it is time to cut the profile or tiered shape. I used a fence and a block as a stop on the band saw to make the lengths of the cuts. Each piece gets fed into the saw twice - another VERY repetitive process and it makes a TON of sawdust.

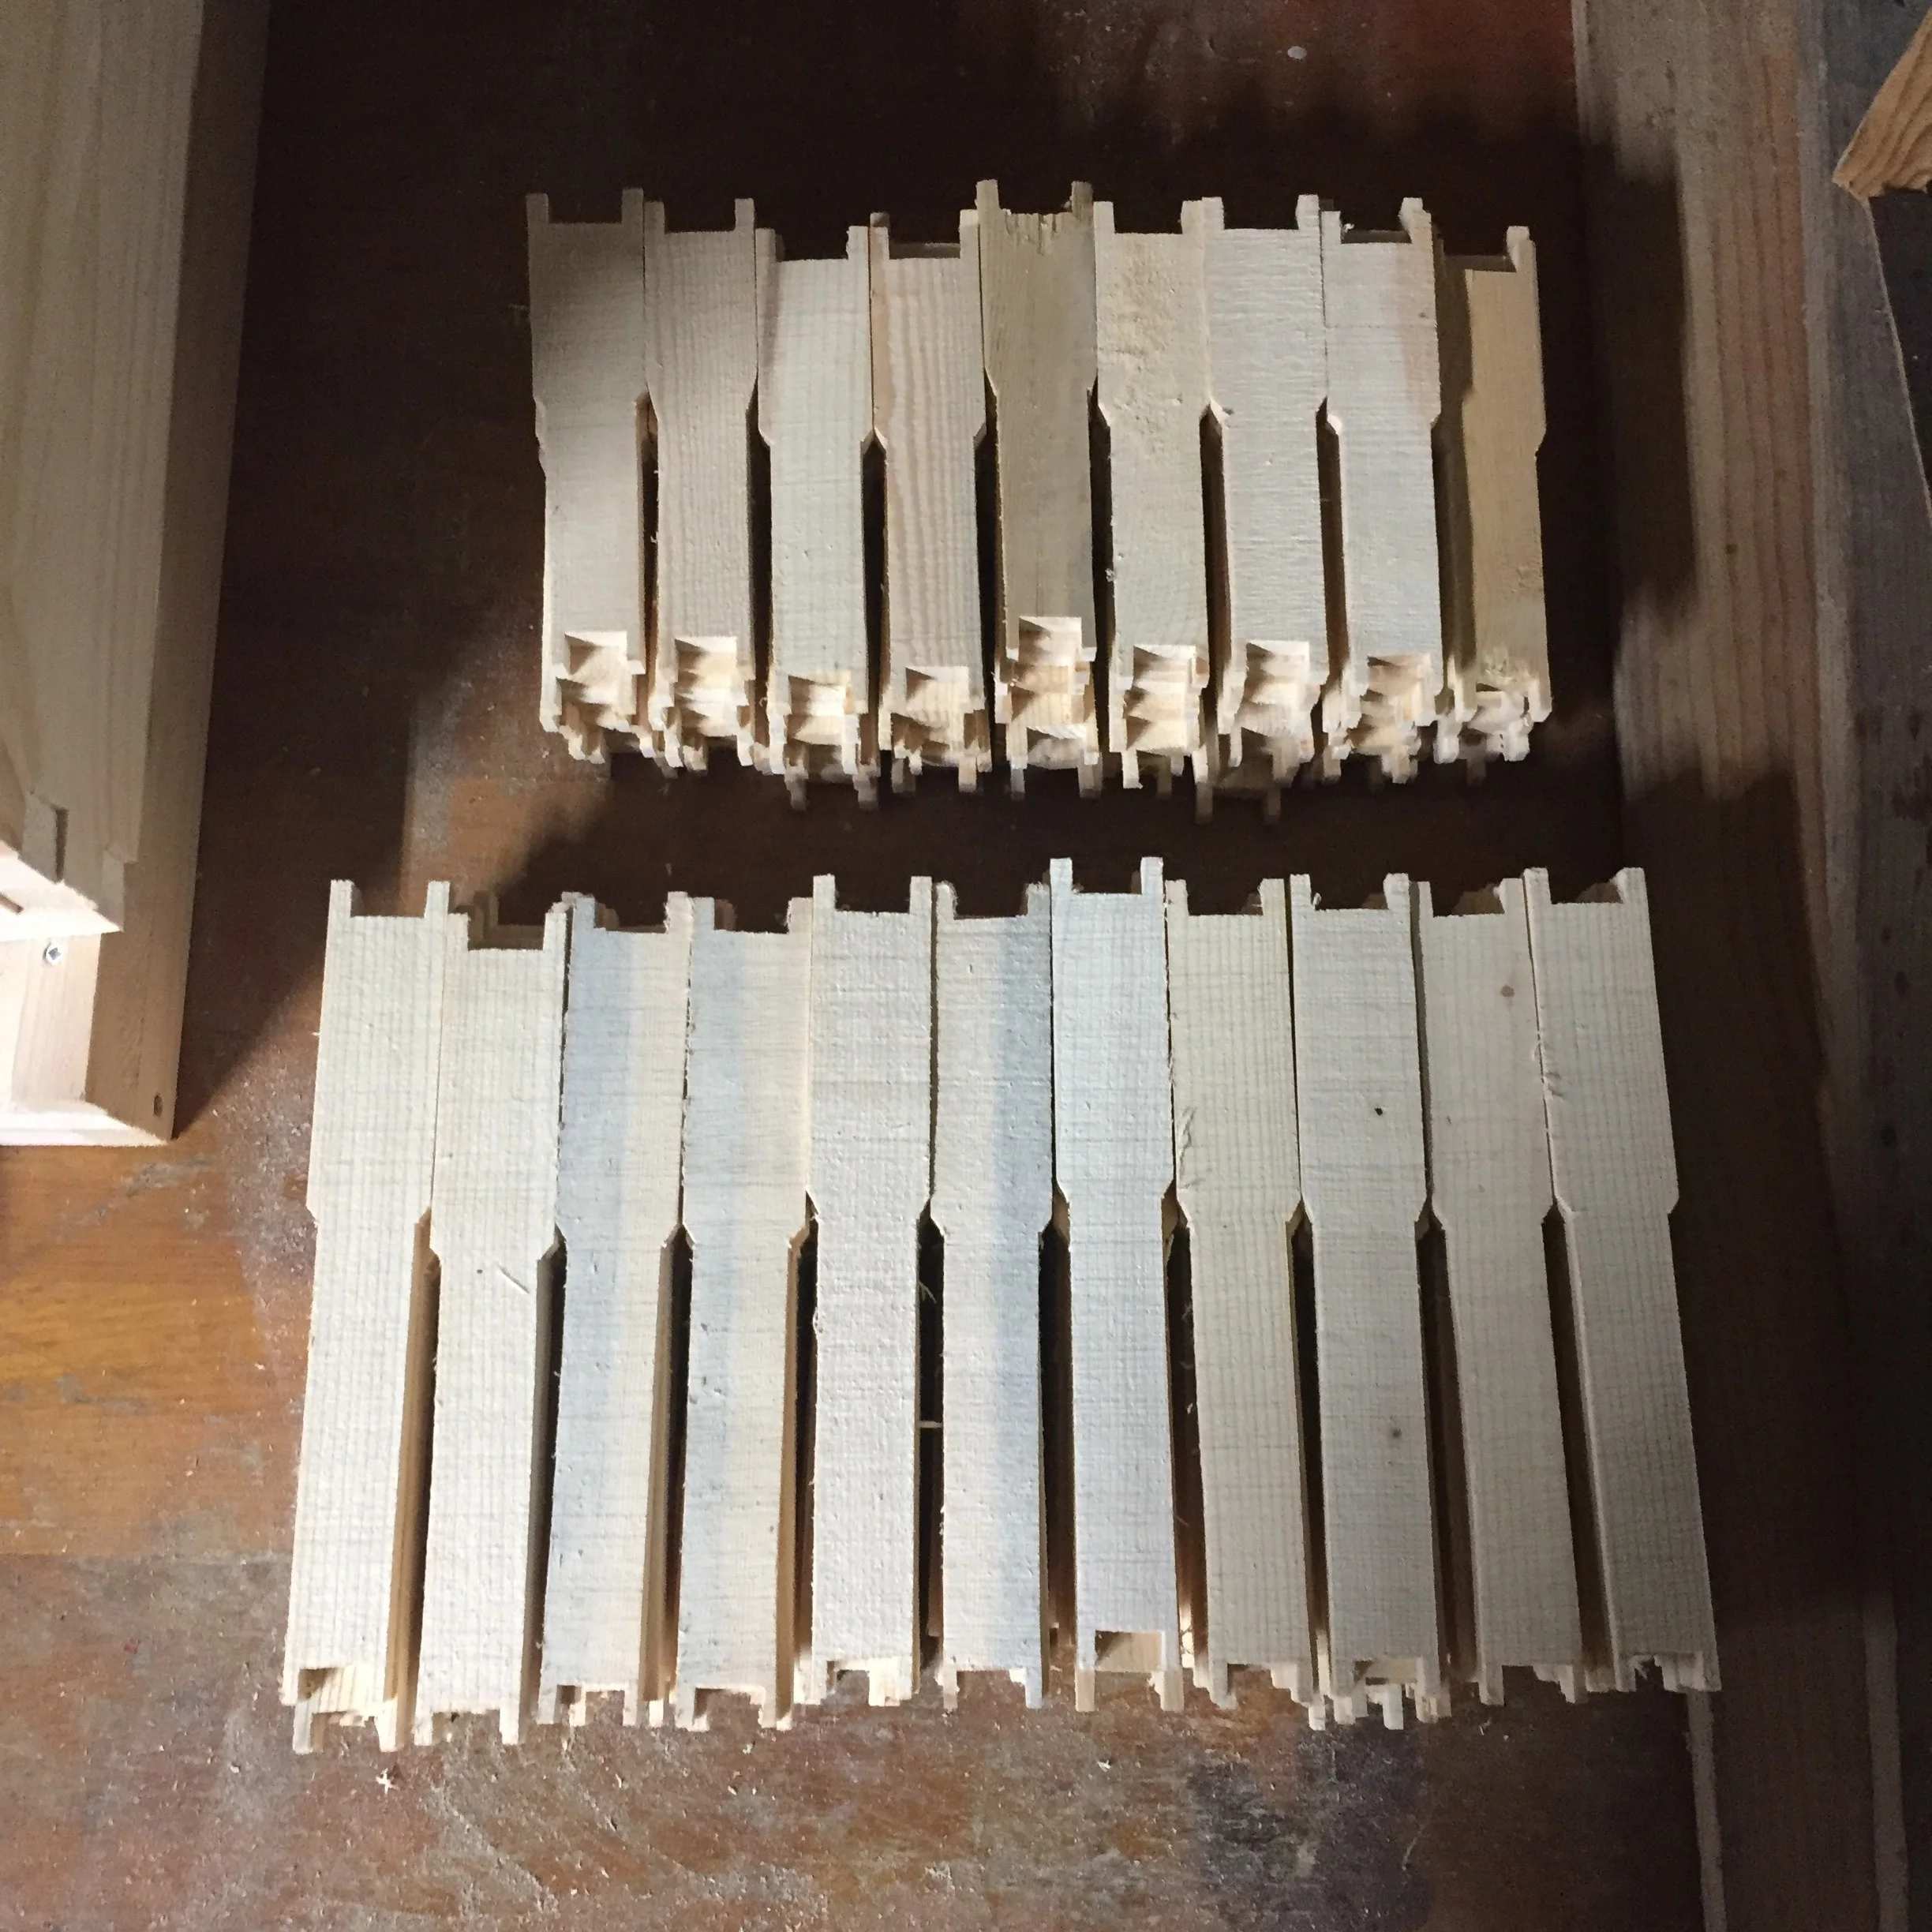
Cutting the frame side profile. Use a stop block for consistent cuts.
After the long cuts were all made, I did a free hand cut at roughly a 45 degree angle to finish off the profile and complete the frames sides.
A few notes:
I did not spend the time sanding off the saw marks or the edges. I am going to life with the rough sides.
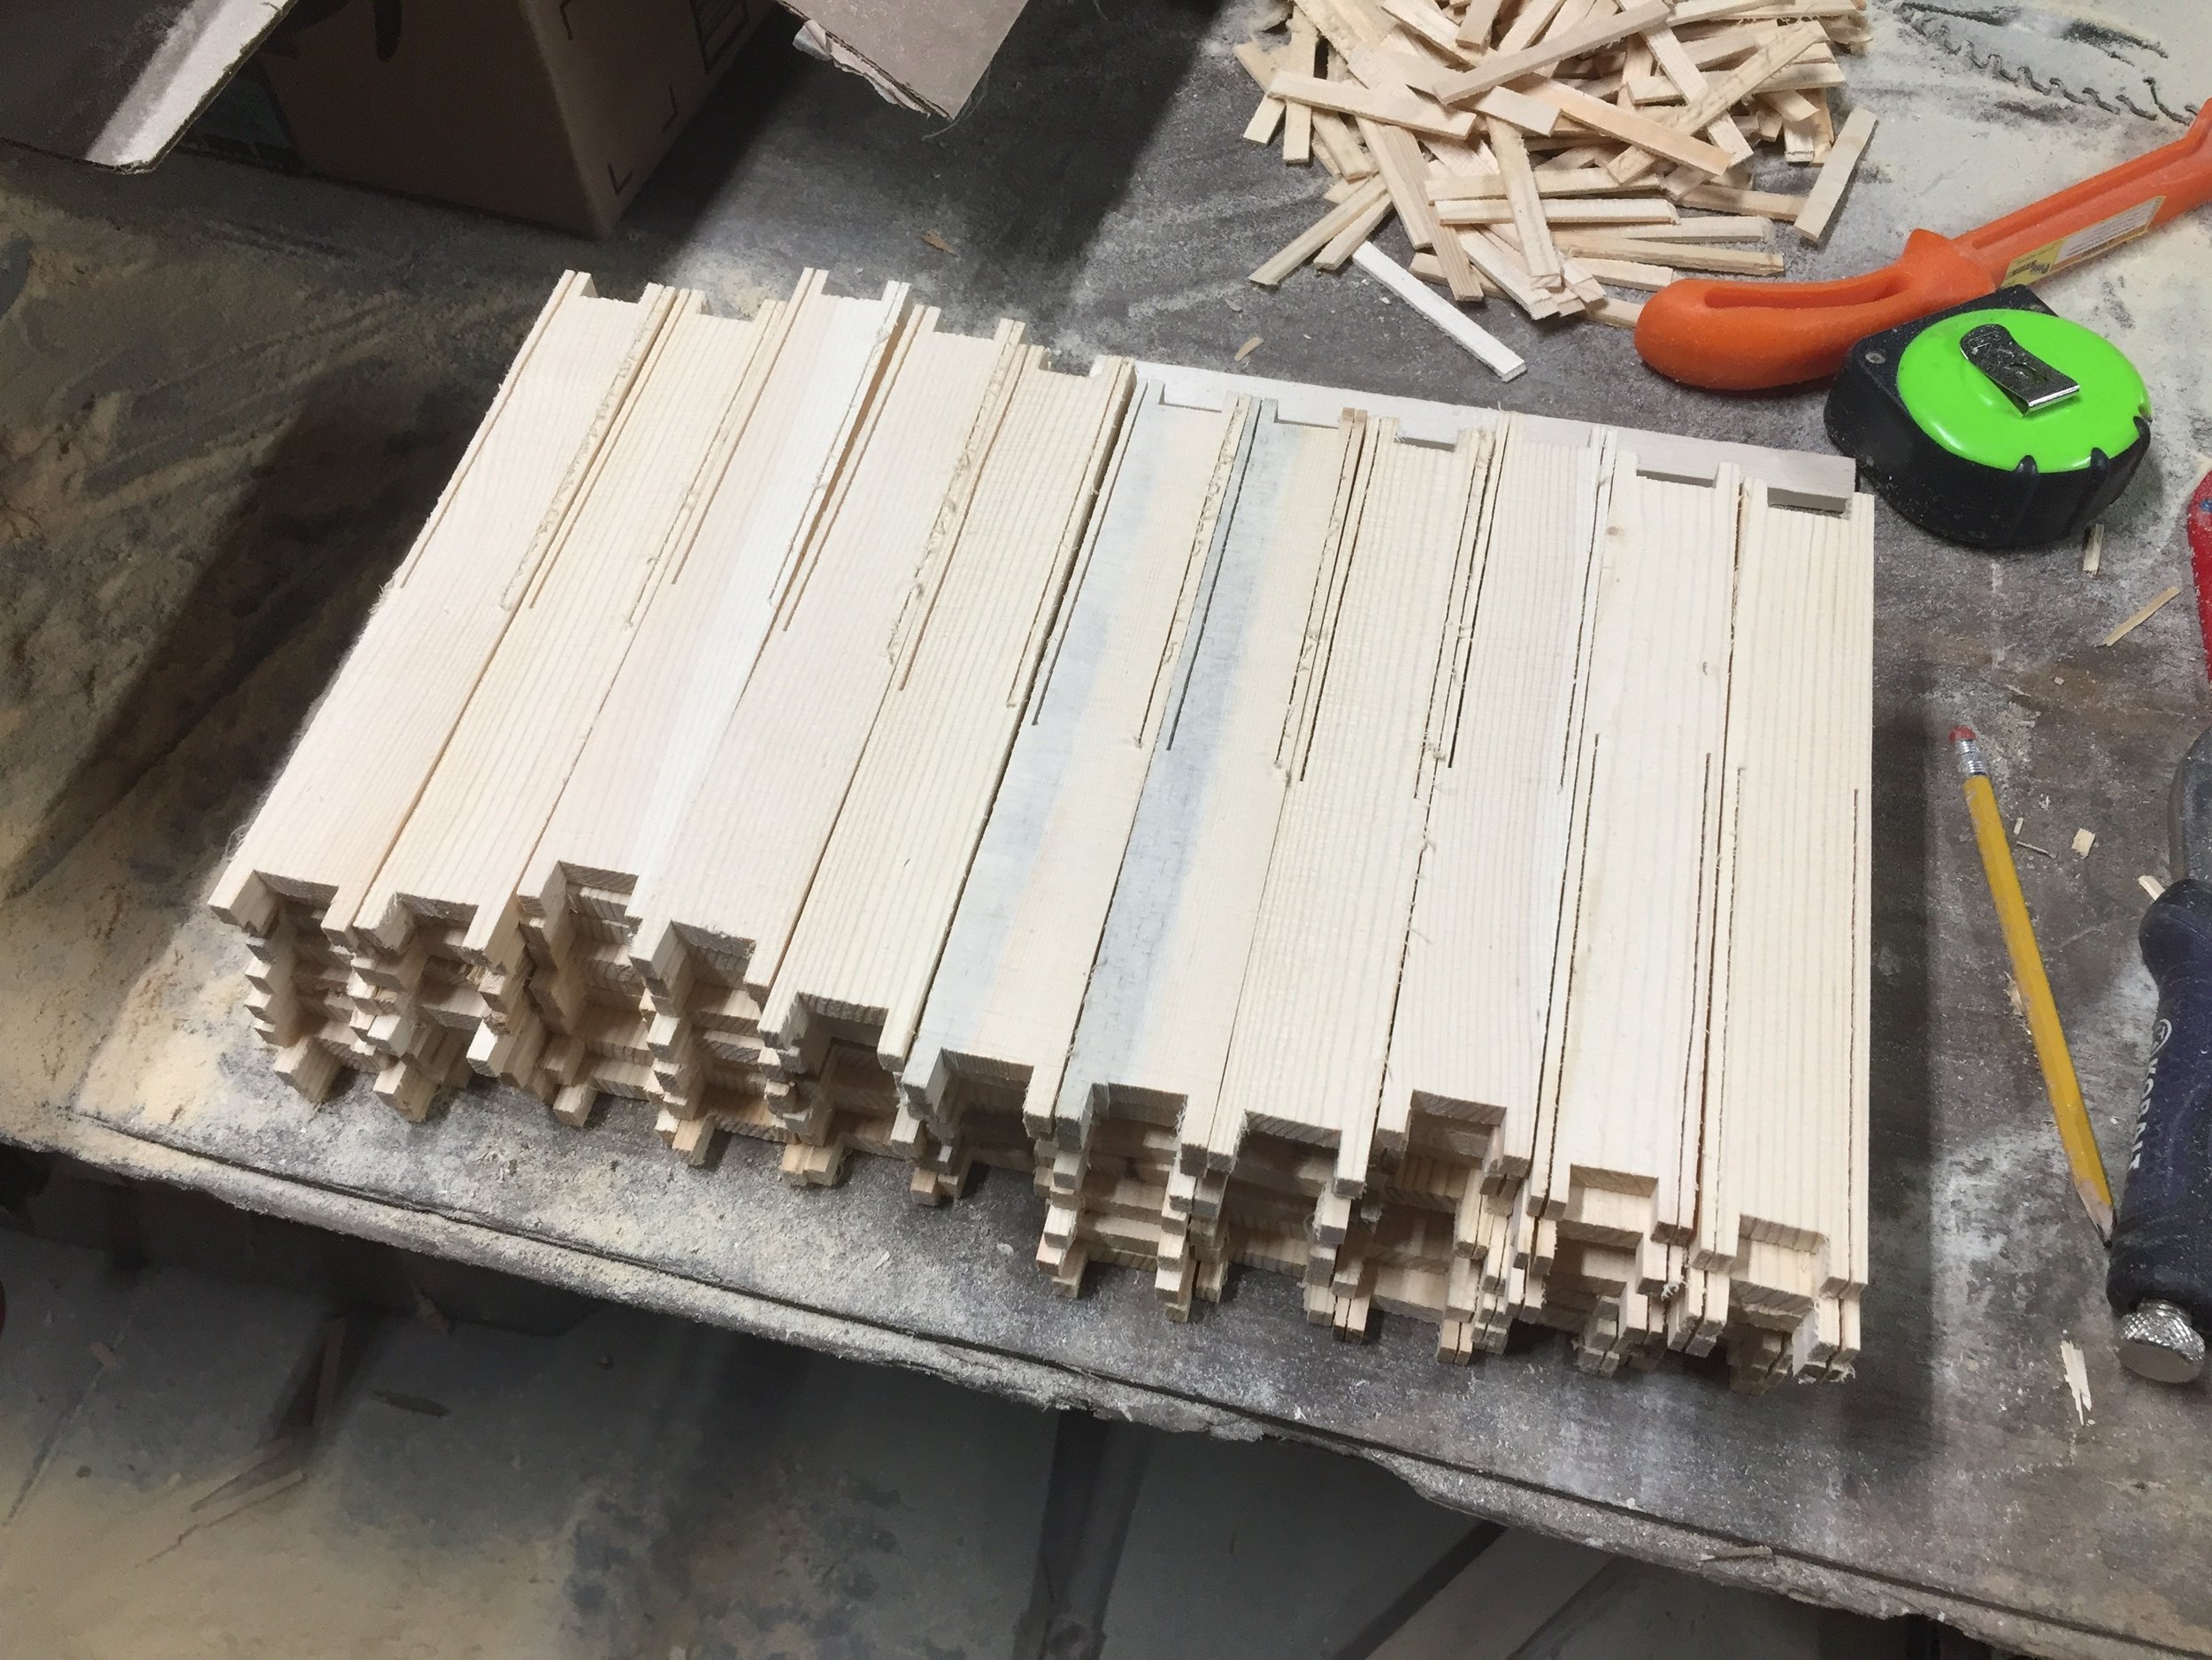
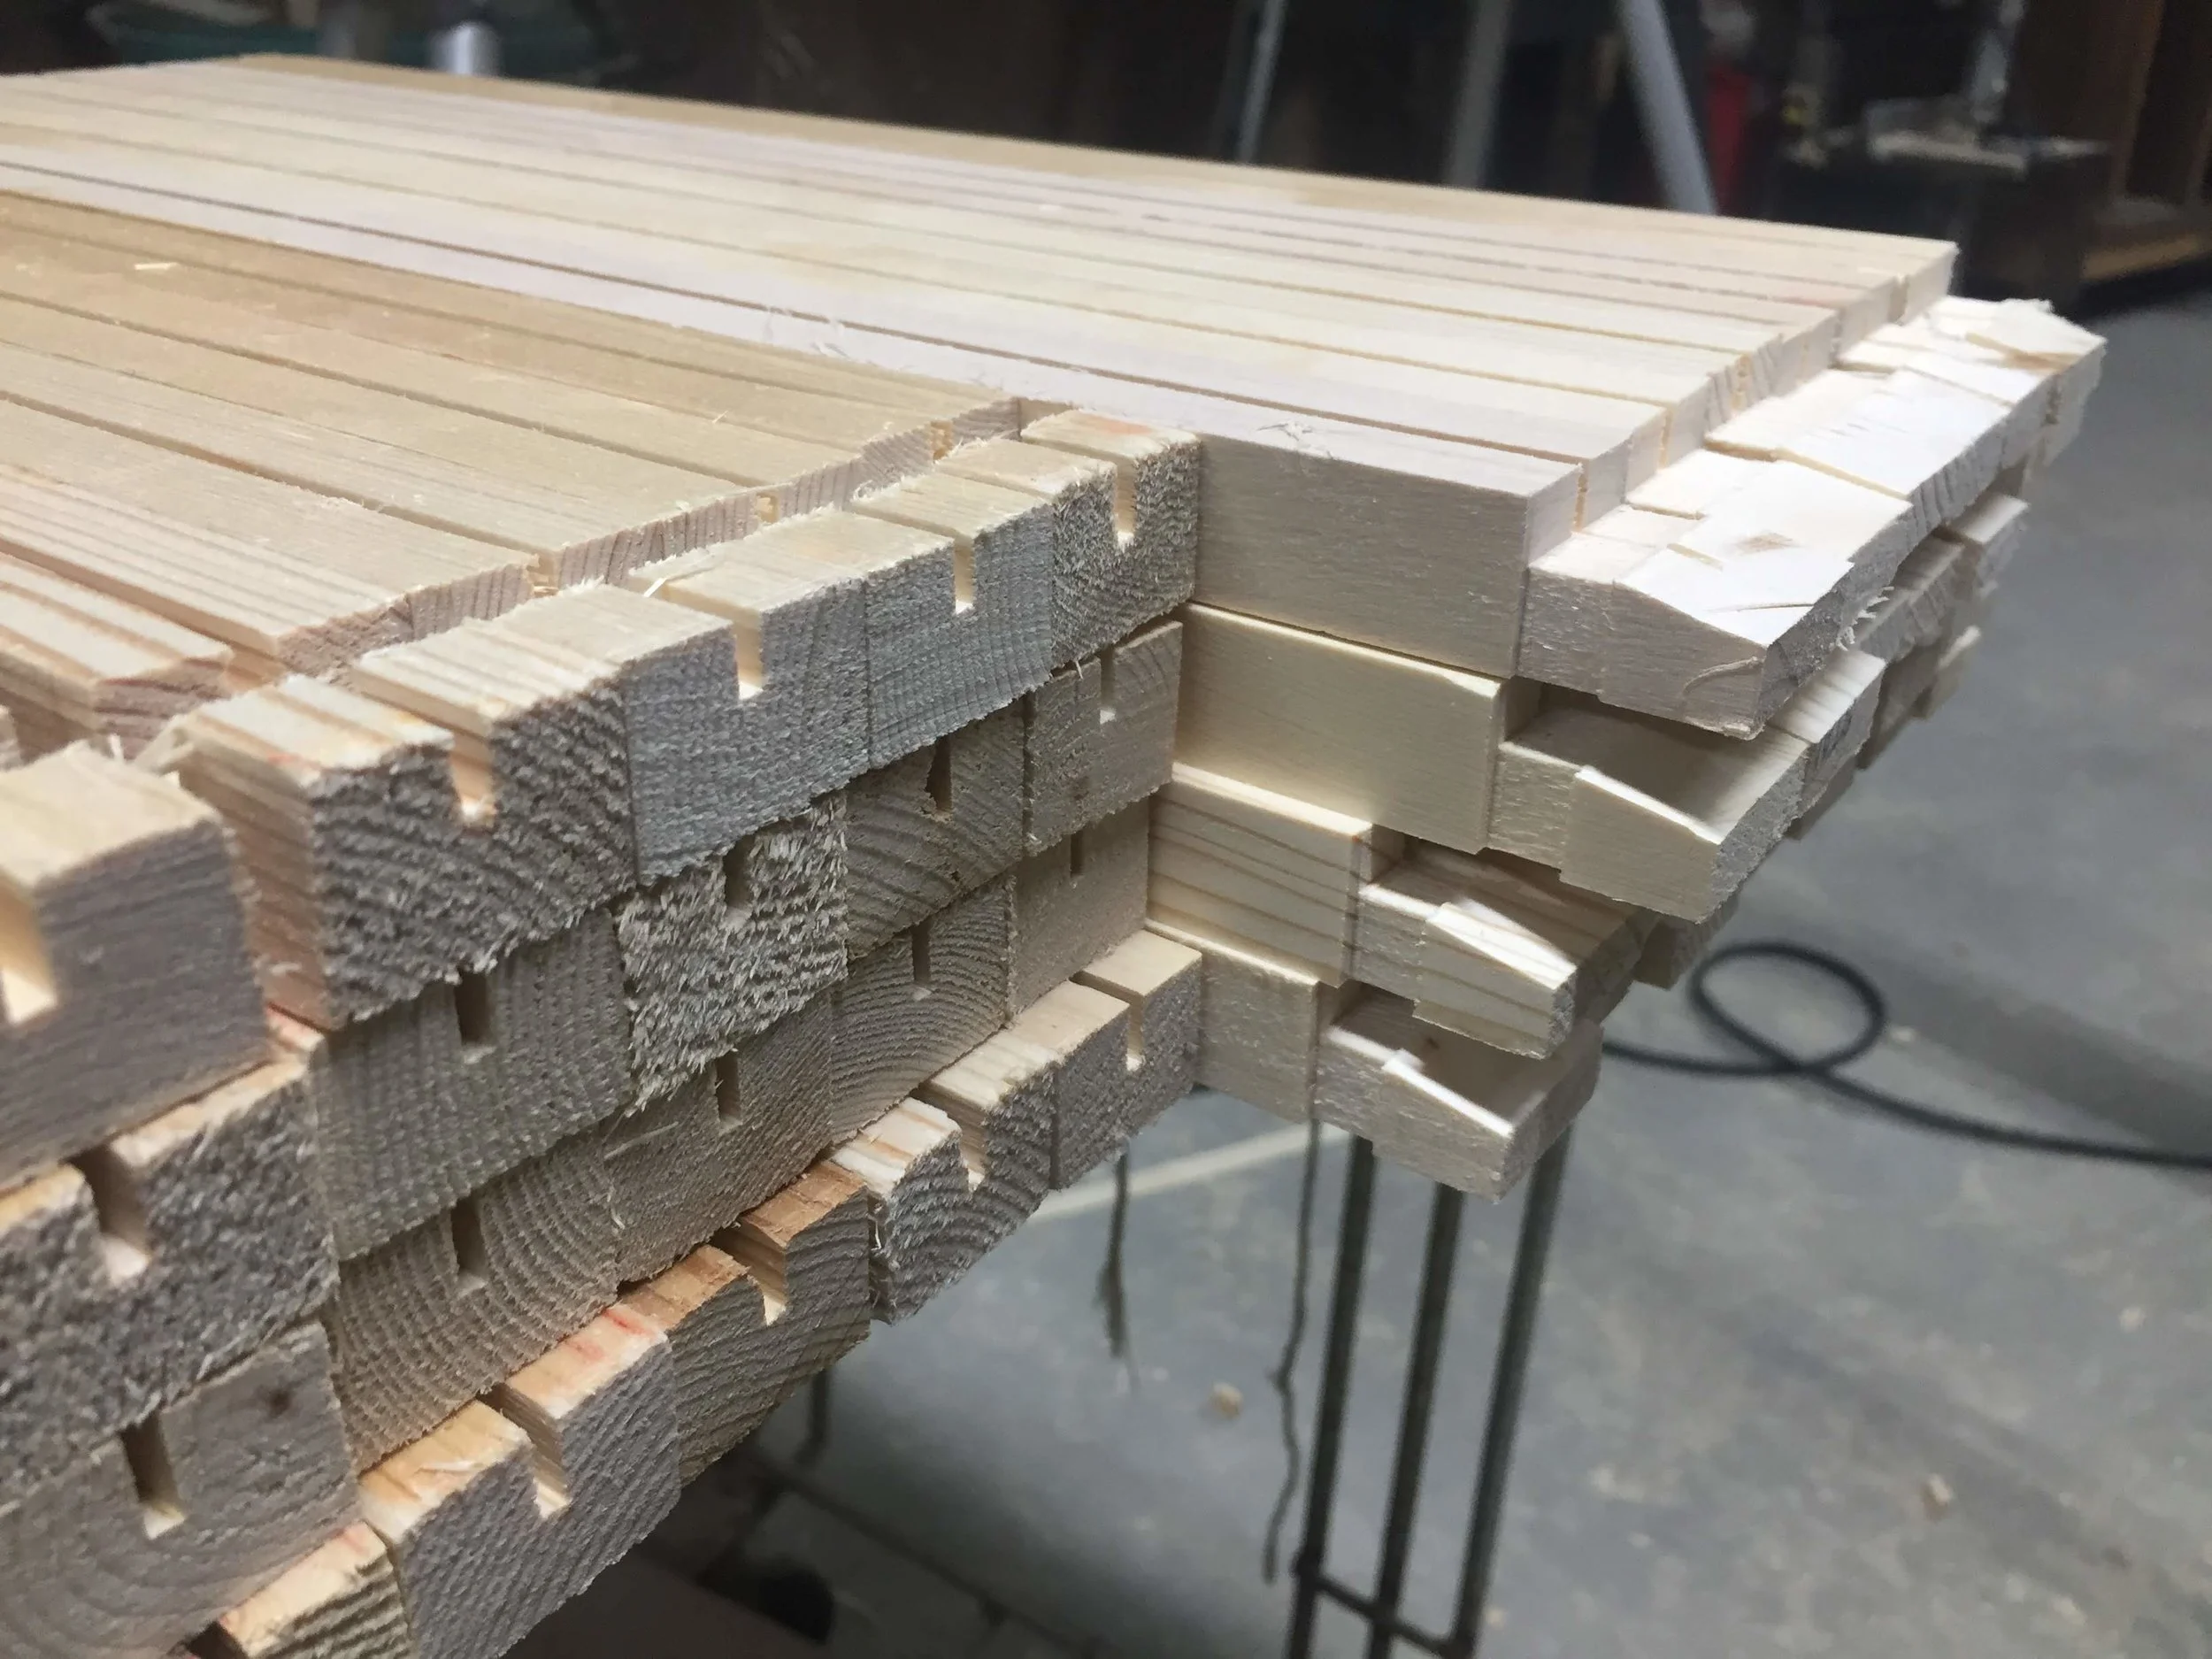
I drilled holes for fishing line/wire/bobby pins later.
Bee Hive Frame side pieces cut and stacked
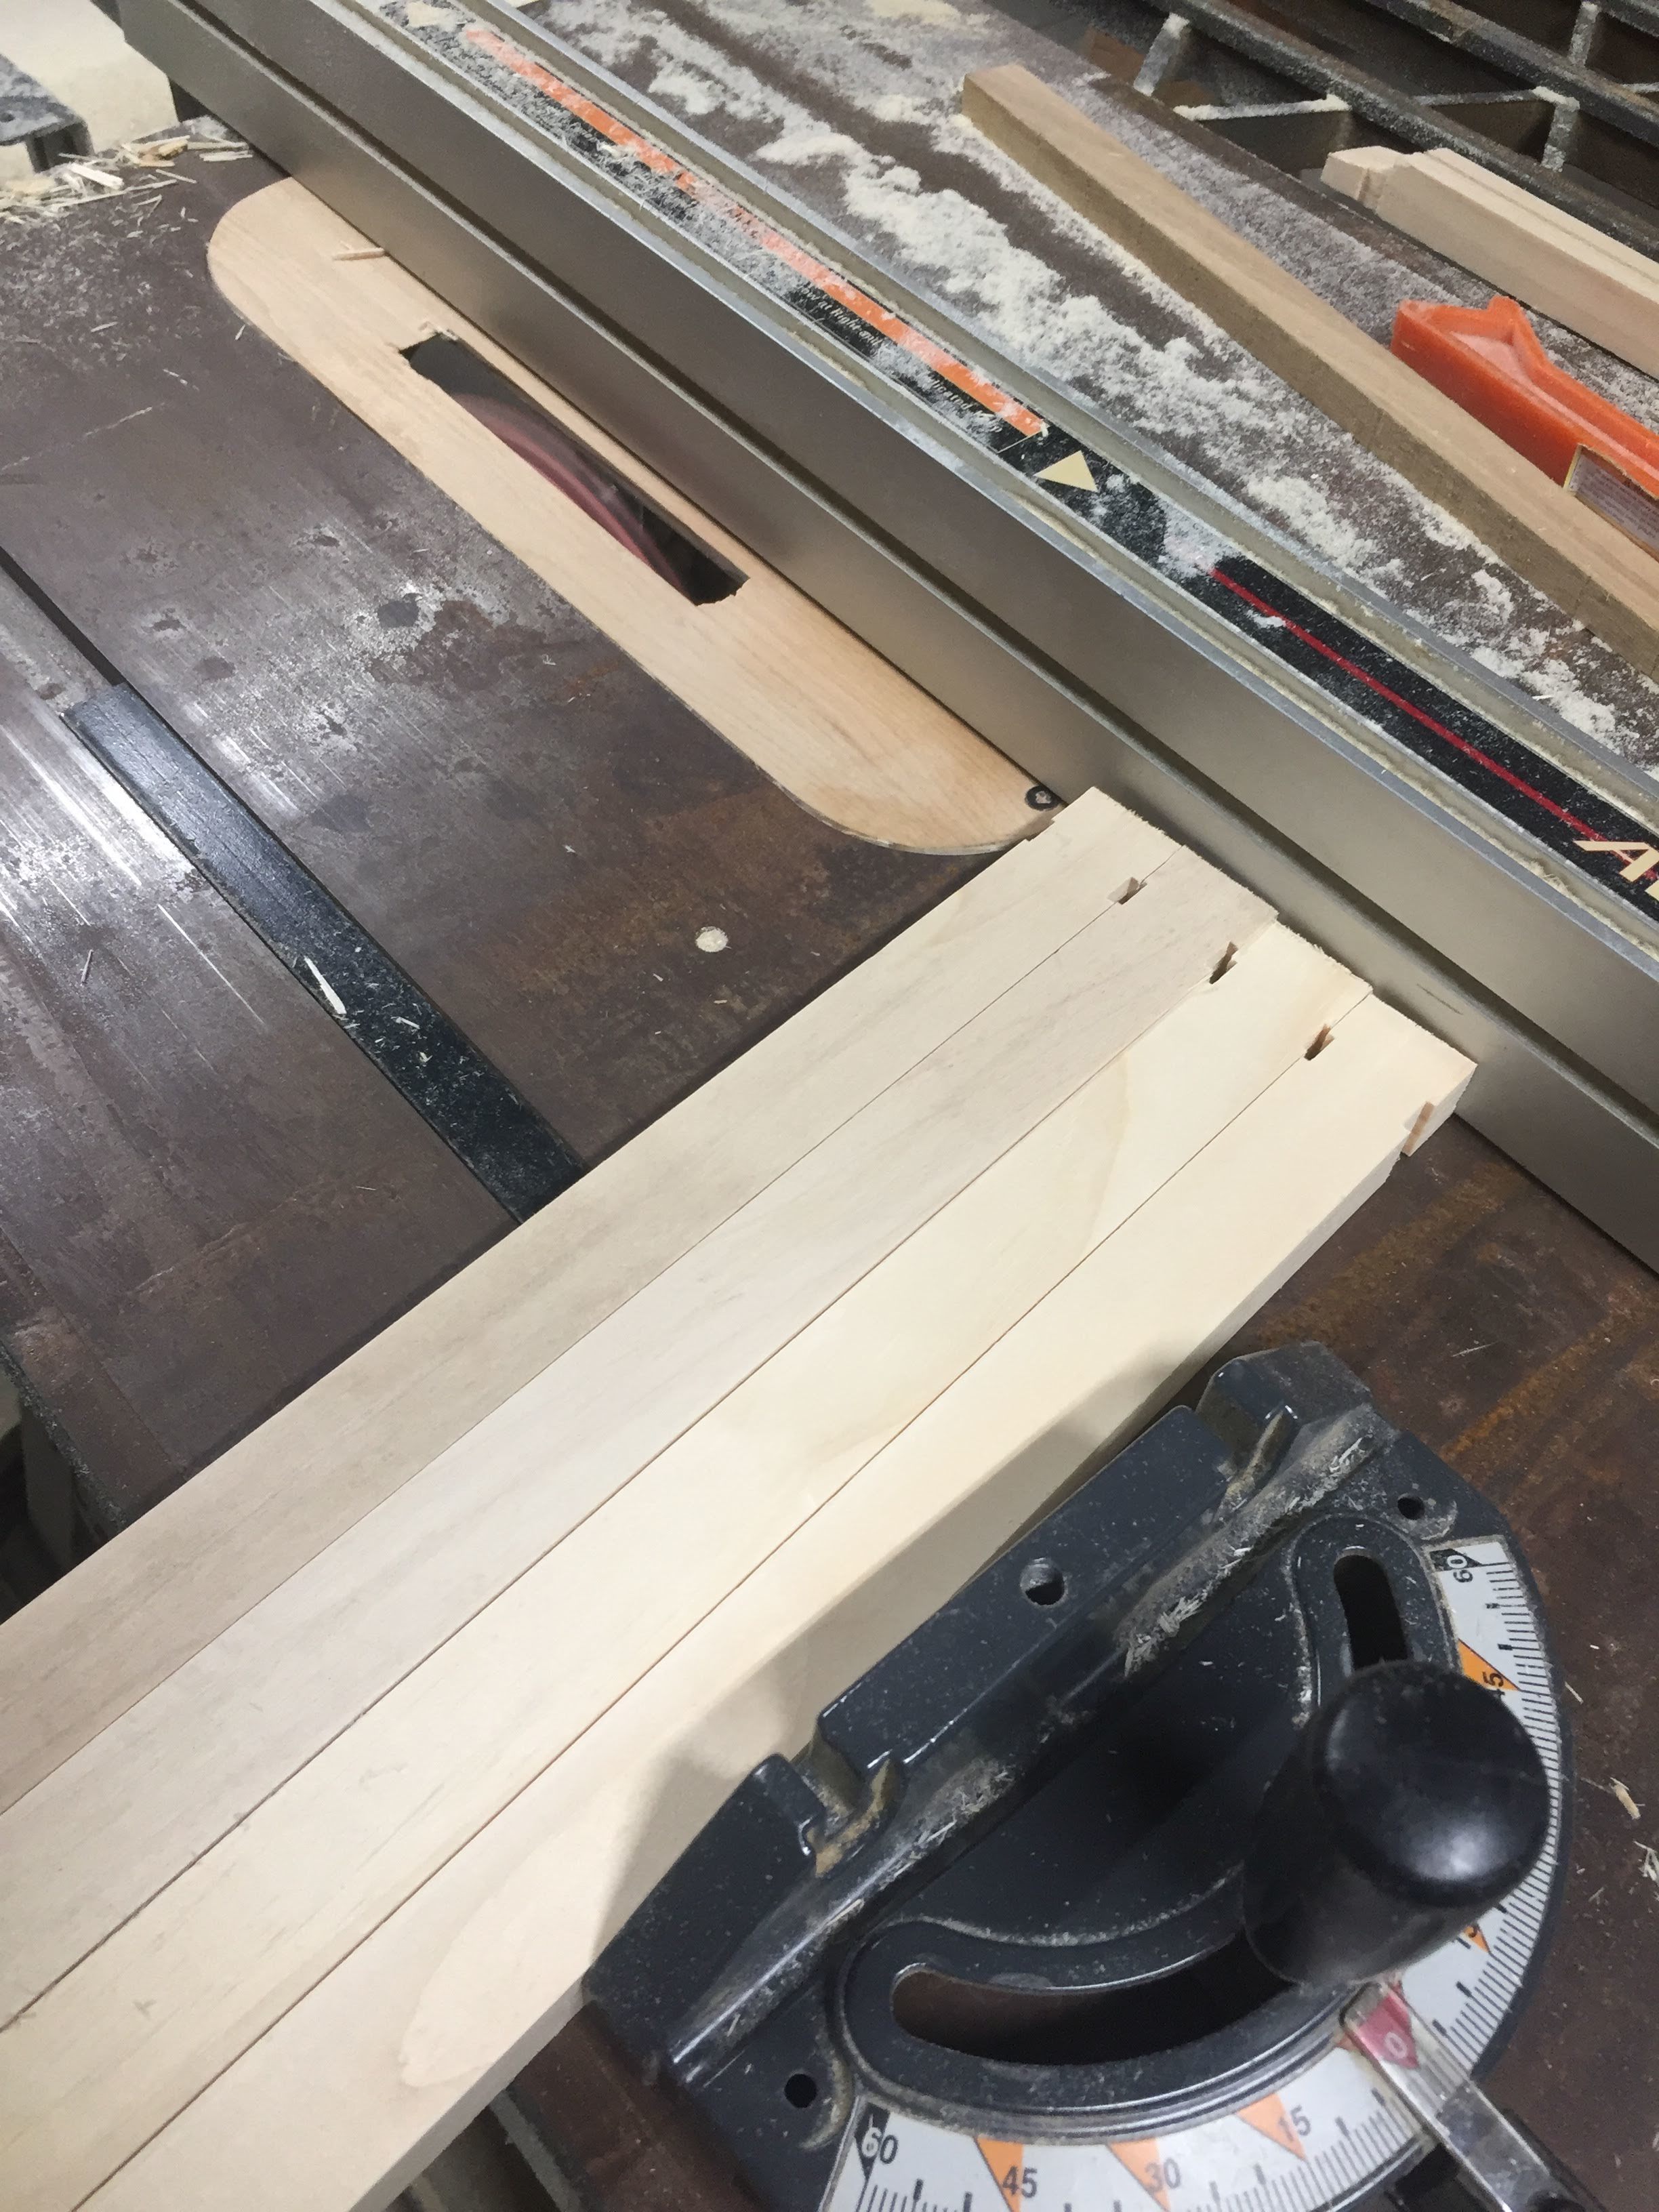
The top board was the next thing that I did. The plans lay out great plans on the step by step way to make them. First I went through all my cutoffs and cut as many 3/4” boards that I had to 19” long. Next, I ran them through the table saw at 1- 1/16” wide. Then, I ripped the groove down the length using a standard table saw blade.
The next steps required using a dado blade again (there is a lot of back and forth with the dado stack and saw blade). Following the step by step plans, the dado stack is set up to 3/8” and I ran the side pieces first. I was able to cut a few of these at a time to speed up the process, but you have to 4x cuts on each piece.

Cutting groves in the top bar of the frame.

Detail of the groove - top bar of the frame
After all the sides are cut, do the deeper cut on the bottom. The great part about this process is the fence is set, and all that changes is the height of the blade for step 3 and 4 on the plans.
Cutting the deeper groove on the bottom of the top bar.
The next step seemed a little dicey, but it worked out. This may not “be the right” way to do it but it worked and was fairly efficient.
Next was to cut the angle ends on each end. I used my table saw with a standard blade and set the saw to a 5 degree angle. I used some scraps to get this set up perfectly, but stood the board up on end and made the cut. The result was perfect, and there were lots of little cut offs.
Cutting the angle on the bee frame top bar.

Cut more pieces then you need when making frames. Work in Progress.
The last step for the top bar is to cut a groove to break off the wax foundation tack strip if you are planning to use wax foundations. This is just another pass through the table saw, leaving about 1/16” to break off when assembling.
The only piece needed is then the bottom bar. Compared to the other pieces of the frame, it is a simple. First, cut the lenghth of a 3/4” board to 17 3/4”. Then rip it on the table saw to 3/8” thick. Finally make another pass to put the groove down the center.
How to Assemble Beehive Frames
I assume you are smarter than I was and you test fit pieces along the way. I didn’t do it as much as I should have and it caught up with me at assembly. From my experience (and I kenw this already) a 3/4” board isn’t actually 3/4'“ exactly, but a dado stack is EXACTLY 3/4”. So the problem is the 3/4” board is sometimes too thick/wide and doesn’t fit in an exactly 3/4” slot.
I had to rasp and file all the joints to make things fit easier. A sharp chisel is another good tool for cleaning up and adjusting where needed.
If you are using wax foundation in your frames, now is the time to remove the tack strip and set it aside.
Assembly was easy though. I did them one by one (no jig required) and used Titebond 3 with 1” brad nails. First I put the side and the top piece together. Then I put the bottom piece on. All the joints received glue, and before nailing I tapped on them with a hammer to make sure everything was seated tightly. I shot a nail down into the sides from the top, another down through the bottom rail into the sides, and then on through the inside up into the top rail just under the tapered tab. I made sure each frame was square before I set them aside for the glue to dry.
After they had set overnight and the glue had cured, I added my wax foundation to the frames. First I put the bottom of the foundation in, and then it easily fit into the top bar. Finally, I added the tack strip and shot 3x 3/4” brad nails in at a steep angle (one on each end and one in the middle).
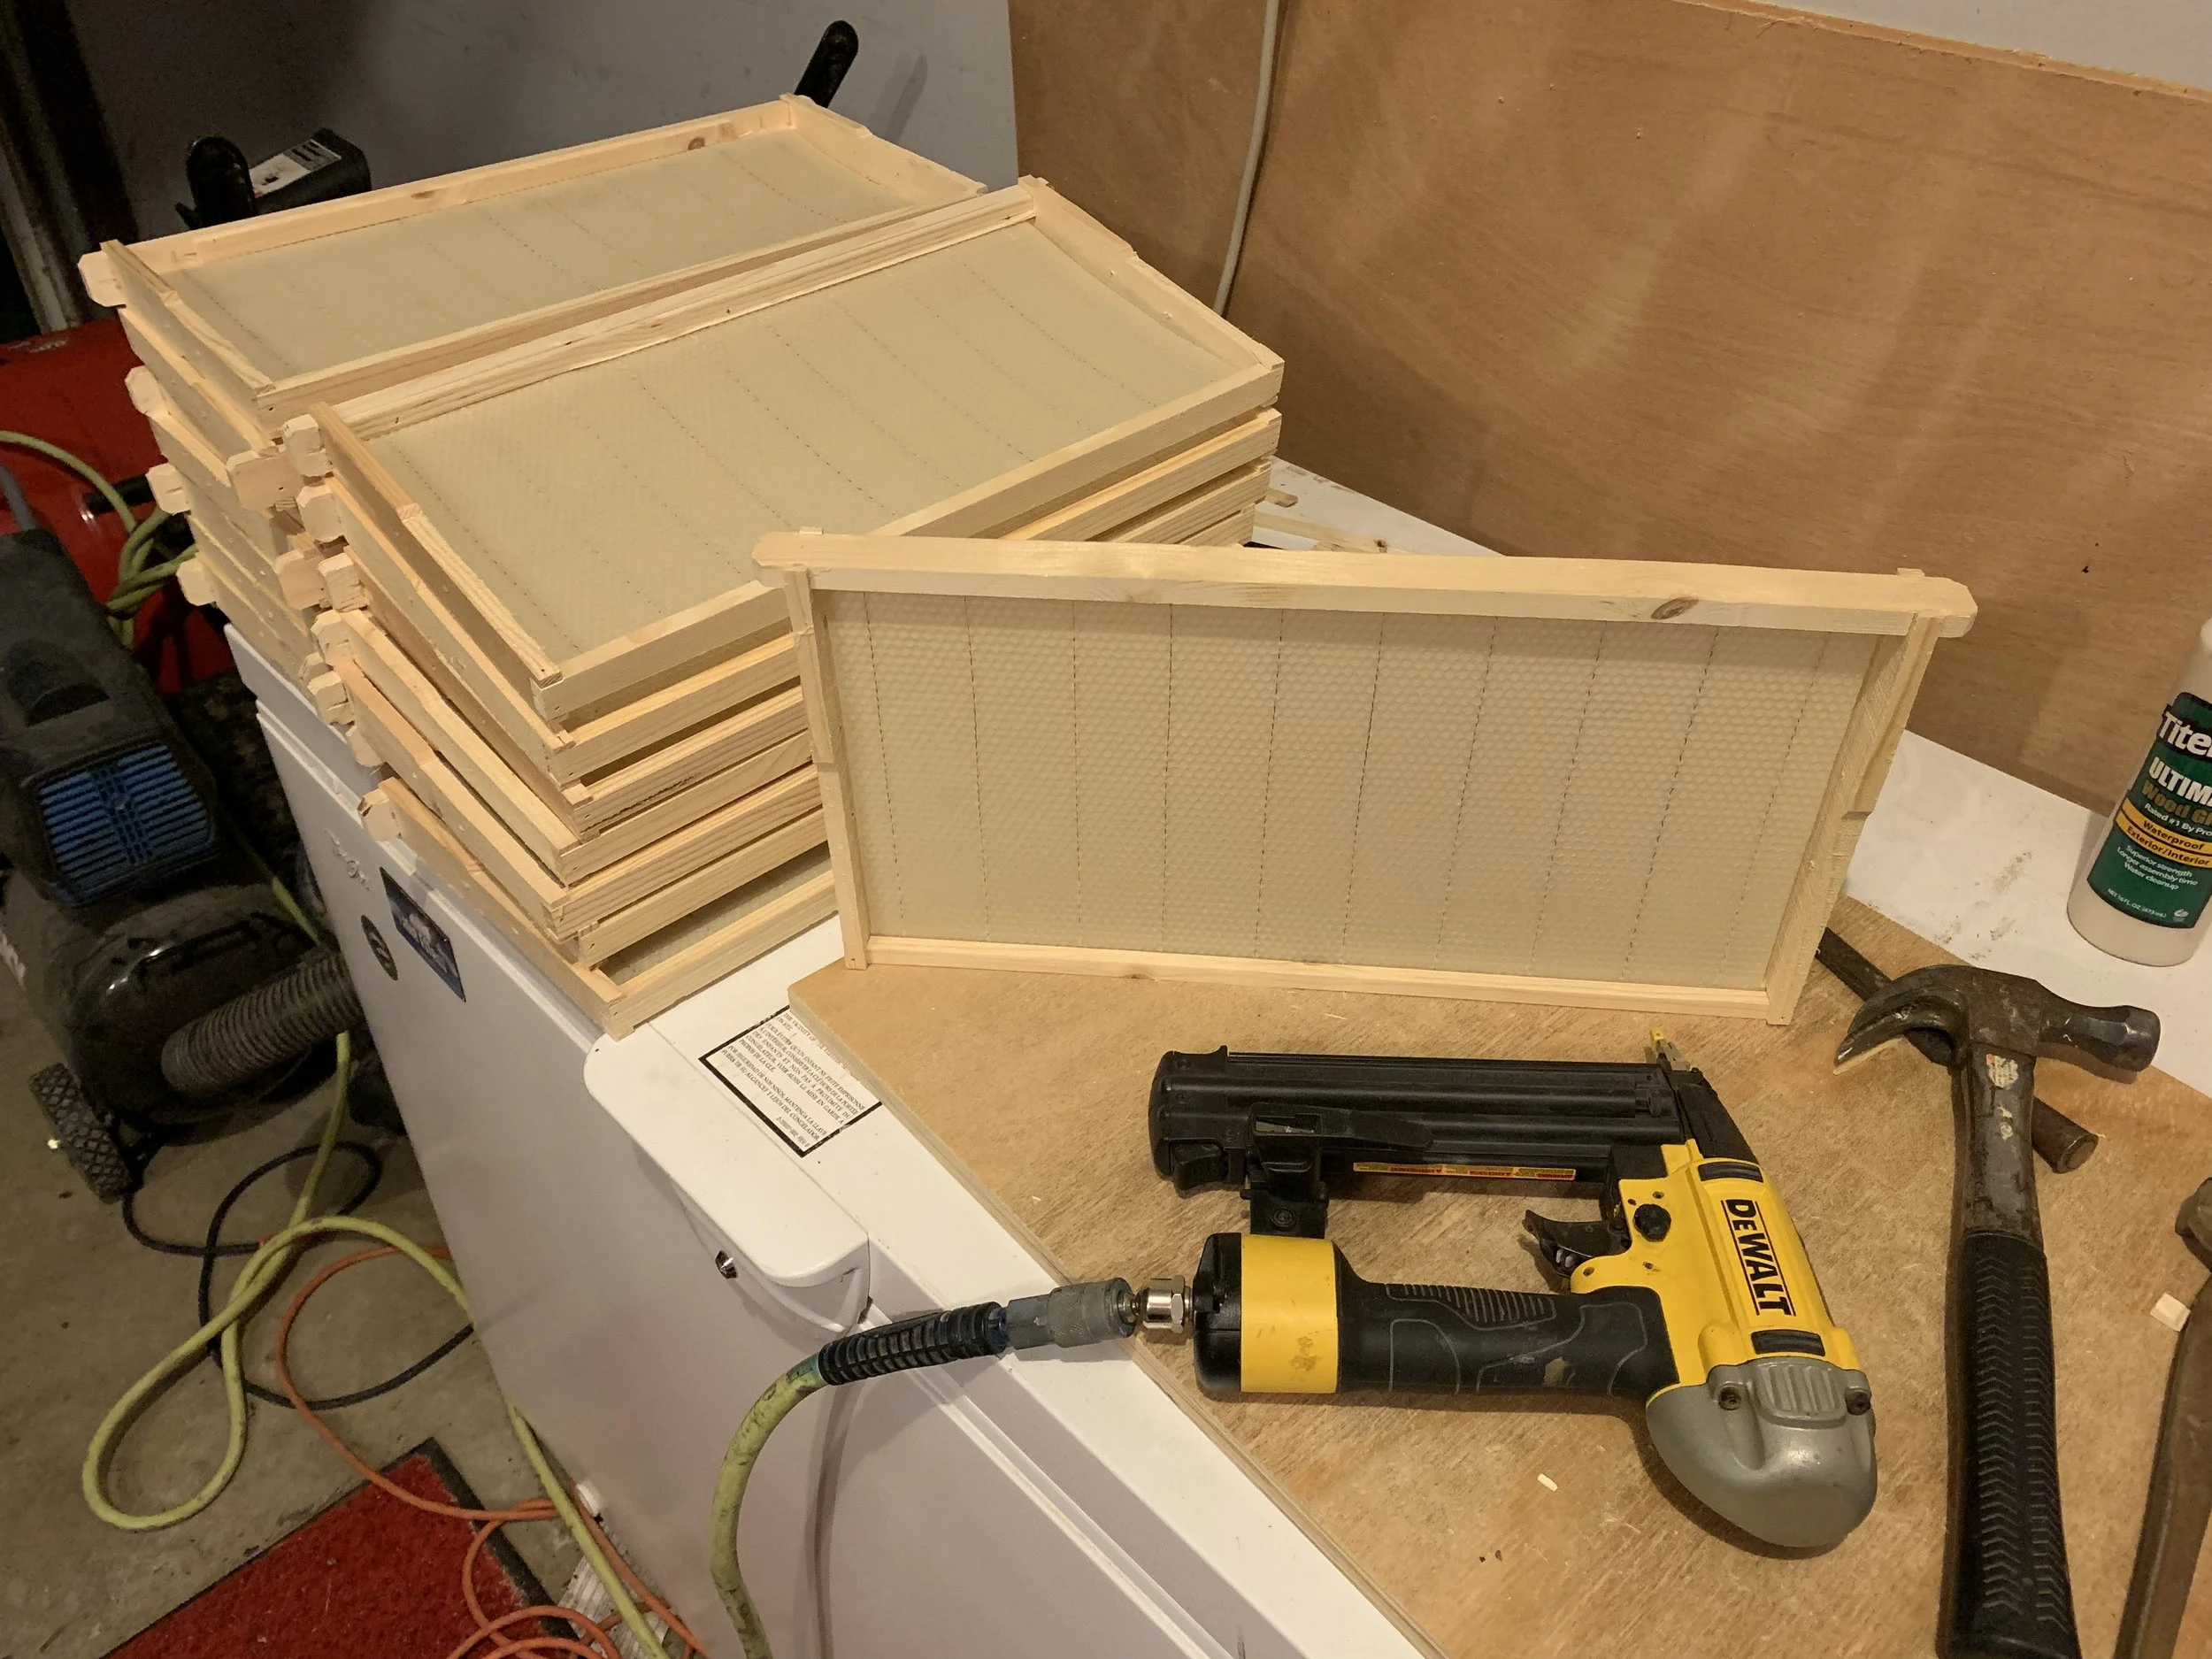
Assembling the bee hive frames and inserting wax foundation.
Final thoughts on How to Build Hive Frames
I’m glad that I did it.
I don’t think I will make the huge quantity again - maybe 30 at a time would be better.
If I did make them again, I would make some jigs first.
Test fit. Then test again. And keep checking your work.
Filing is no fun.
I loved using up scrap wood on these frames. It is a great use, and cleans up the shop.
Make WAY more than you need. I wish I had made even more extras.
Give yourself plenty of time before you need them. The entire frame process took a few weeks - more on that later.
Overall I am am happy to say that I have built these frames. I have an appreciation for the machining that makes these, but know that I can turn stock wood into useful things. If you have the time, do it, at least once.
This article is part of a 5 part series on building beehives. I have decided to build 8 frame hives in my workshop with common woodworking tools. I am building my hives myself to save money over buying, and to challenge myself on a fulfilling project. This is not a step by step guide for a novice woodworker, but a snapshot into my experience on how I built my own hives to use.
HOW TO BUILD A BEEHIVE - PART 1: THE PLAN AND PREP
HOW TO BUILD A BEEHIVE - PART 2: BUILDING BEEHIVE BOXES - DEEPS AND MEDIUMS
HOW TO BUILD A BEEHIVE - PART 3: BUILDING FRAMES
HOW TO BUILD A BEEHIVE - PART 5: FINAL THOUGHTS AND TOTAL COST