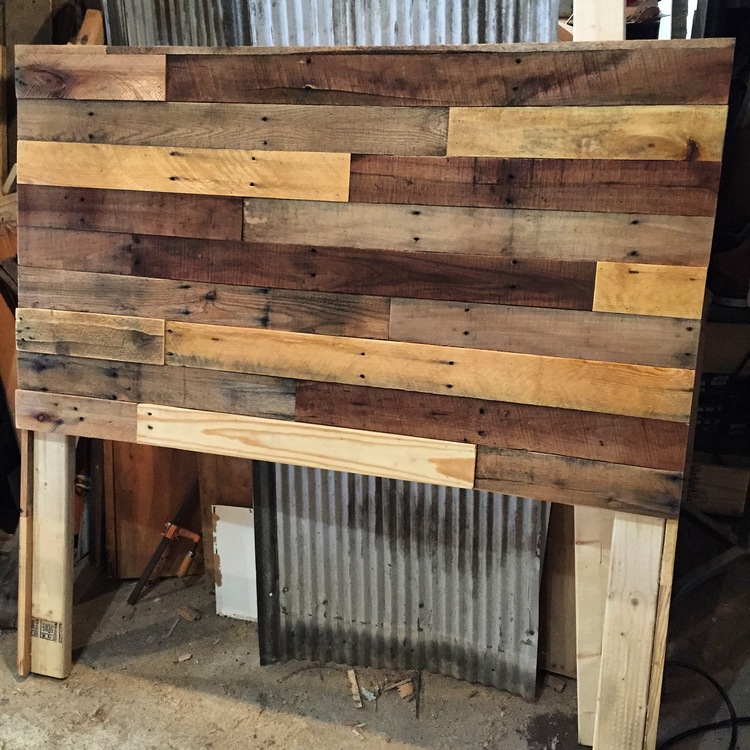
Pallet Wood Headboard DIY
Adam Koons
Affiliate Disclosure: Thank you supporting us by visiting our site and posts. This website contains affiliate links that are ads recommended to you, that we can earn a small payout on. We only use Amazon Associates and Google Adsense. By clicking on these ads, making a purchase, or taking other action, we can earn a little extra money to fund future projects.
Detailed Plans and Builders Guide are available for Download in our Shop. They contain all the information for a Twin, Double, Queen, or King headboard. They also have options for mounting to the wall or connecting to a bed frame.
This digital download contains Plans and Builders guide to make a pallet wood headboard for a Twin, Full/Double, Queen, or King. It has options for securing the headboard to a bed frame, or hanging it on the wall.
Pallet headboards add a rustic, yet modern feature to the bedroom. Pallet wood offers a blend of warm colors and rich tones, and is readily available. This project is something that you can make custom to your bed for little to know cost. We found our pallets free on craigslist, and have a few local businesses that are happy to give them away.
The following post is generally how to build a pallet wood headboard. For a detailed, step by step process on building a headboard, check out our plans and builders guide.
We started this headboard by taking measurements of the bed frame that the headboard was being made for. You will want to measure to the outside edge of the bed frame headboard brackets. Then you will want to add 1-2" to the total distance to give a slight overhang, and so that the mounting bolts will be in the center of the supports. You want to make sure the headboard doesn't look skinnier than the bed after the pillows, comforters, etc are added. Then using plywood, cut the width of your headboard.
Next select the height of your headboard. First we measured the distance from the floor to the top of the mattress. Then we determined how tall we wanted our headboard to be by measuring from the to where the top of the headboard would be. With some simple math, our plywood piece needed to then be cut to the difference of those numbers. Finally, we cut two 2x4s for our bed posts, and screwed them together.
It was now time to attach the pallet wood. We started at the top of the headboard in case we needed to rip the pallet wood to a narrow piece at the bottom, which would be covered by bedding. We used brad nails and construction glue to attach each piece. I would recommend that you cut each pallet board square on the ends, and then make sure that each board in the row is the same width. Taking the time to square the wood up and rip them to the same size minimizes gaps between the boards.
Next we sanded the headboard to remove any splinters or rough spots. It probably would be better to sand each board before it is nailed on. Since our pallet wood had different thickness, it took extra effort to sand it all.
Finally, we applied a satin varnish to the wood. This is to blend the wood and seal it up. I recommend 2-3 coats to ensure even application and so that it all get covered. Pallet wood will often soak up the varnish quickly on the first coat.
The last step was attaching the head board to the bed frame using bolts. Be sure to use washers and tighten them down to minimize the wobble between the frame and headboard.
Bonus steps: Add lights for reading or paint a quote on the wood for a custom touch.
Detailed Plans and Builders Guide are available for Download in our Shop. They contain all the information for a Twin, Double, Queen, or King headboard. They also have options for mounting to the wall or connecting to a bed frame.
This digital download contains Plans and Builders guide to make a pallet wood headboard for a Twin, Full/Double, Queen, or King. It has options for securing the headboard to a bed frame, or hanging it on the wall.


